This article walks through what a customer sees during an unattended Self-Checkout session, so you know what to expect at the station. To set one up, see Setting up Self-Checkout on Register.
Starting a session
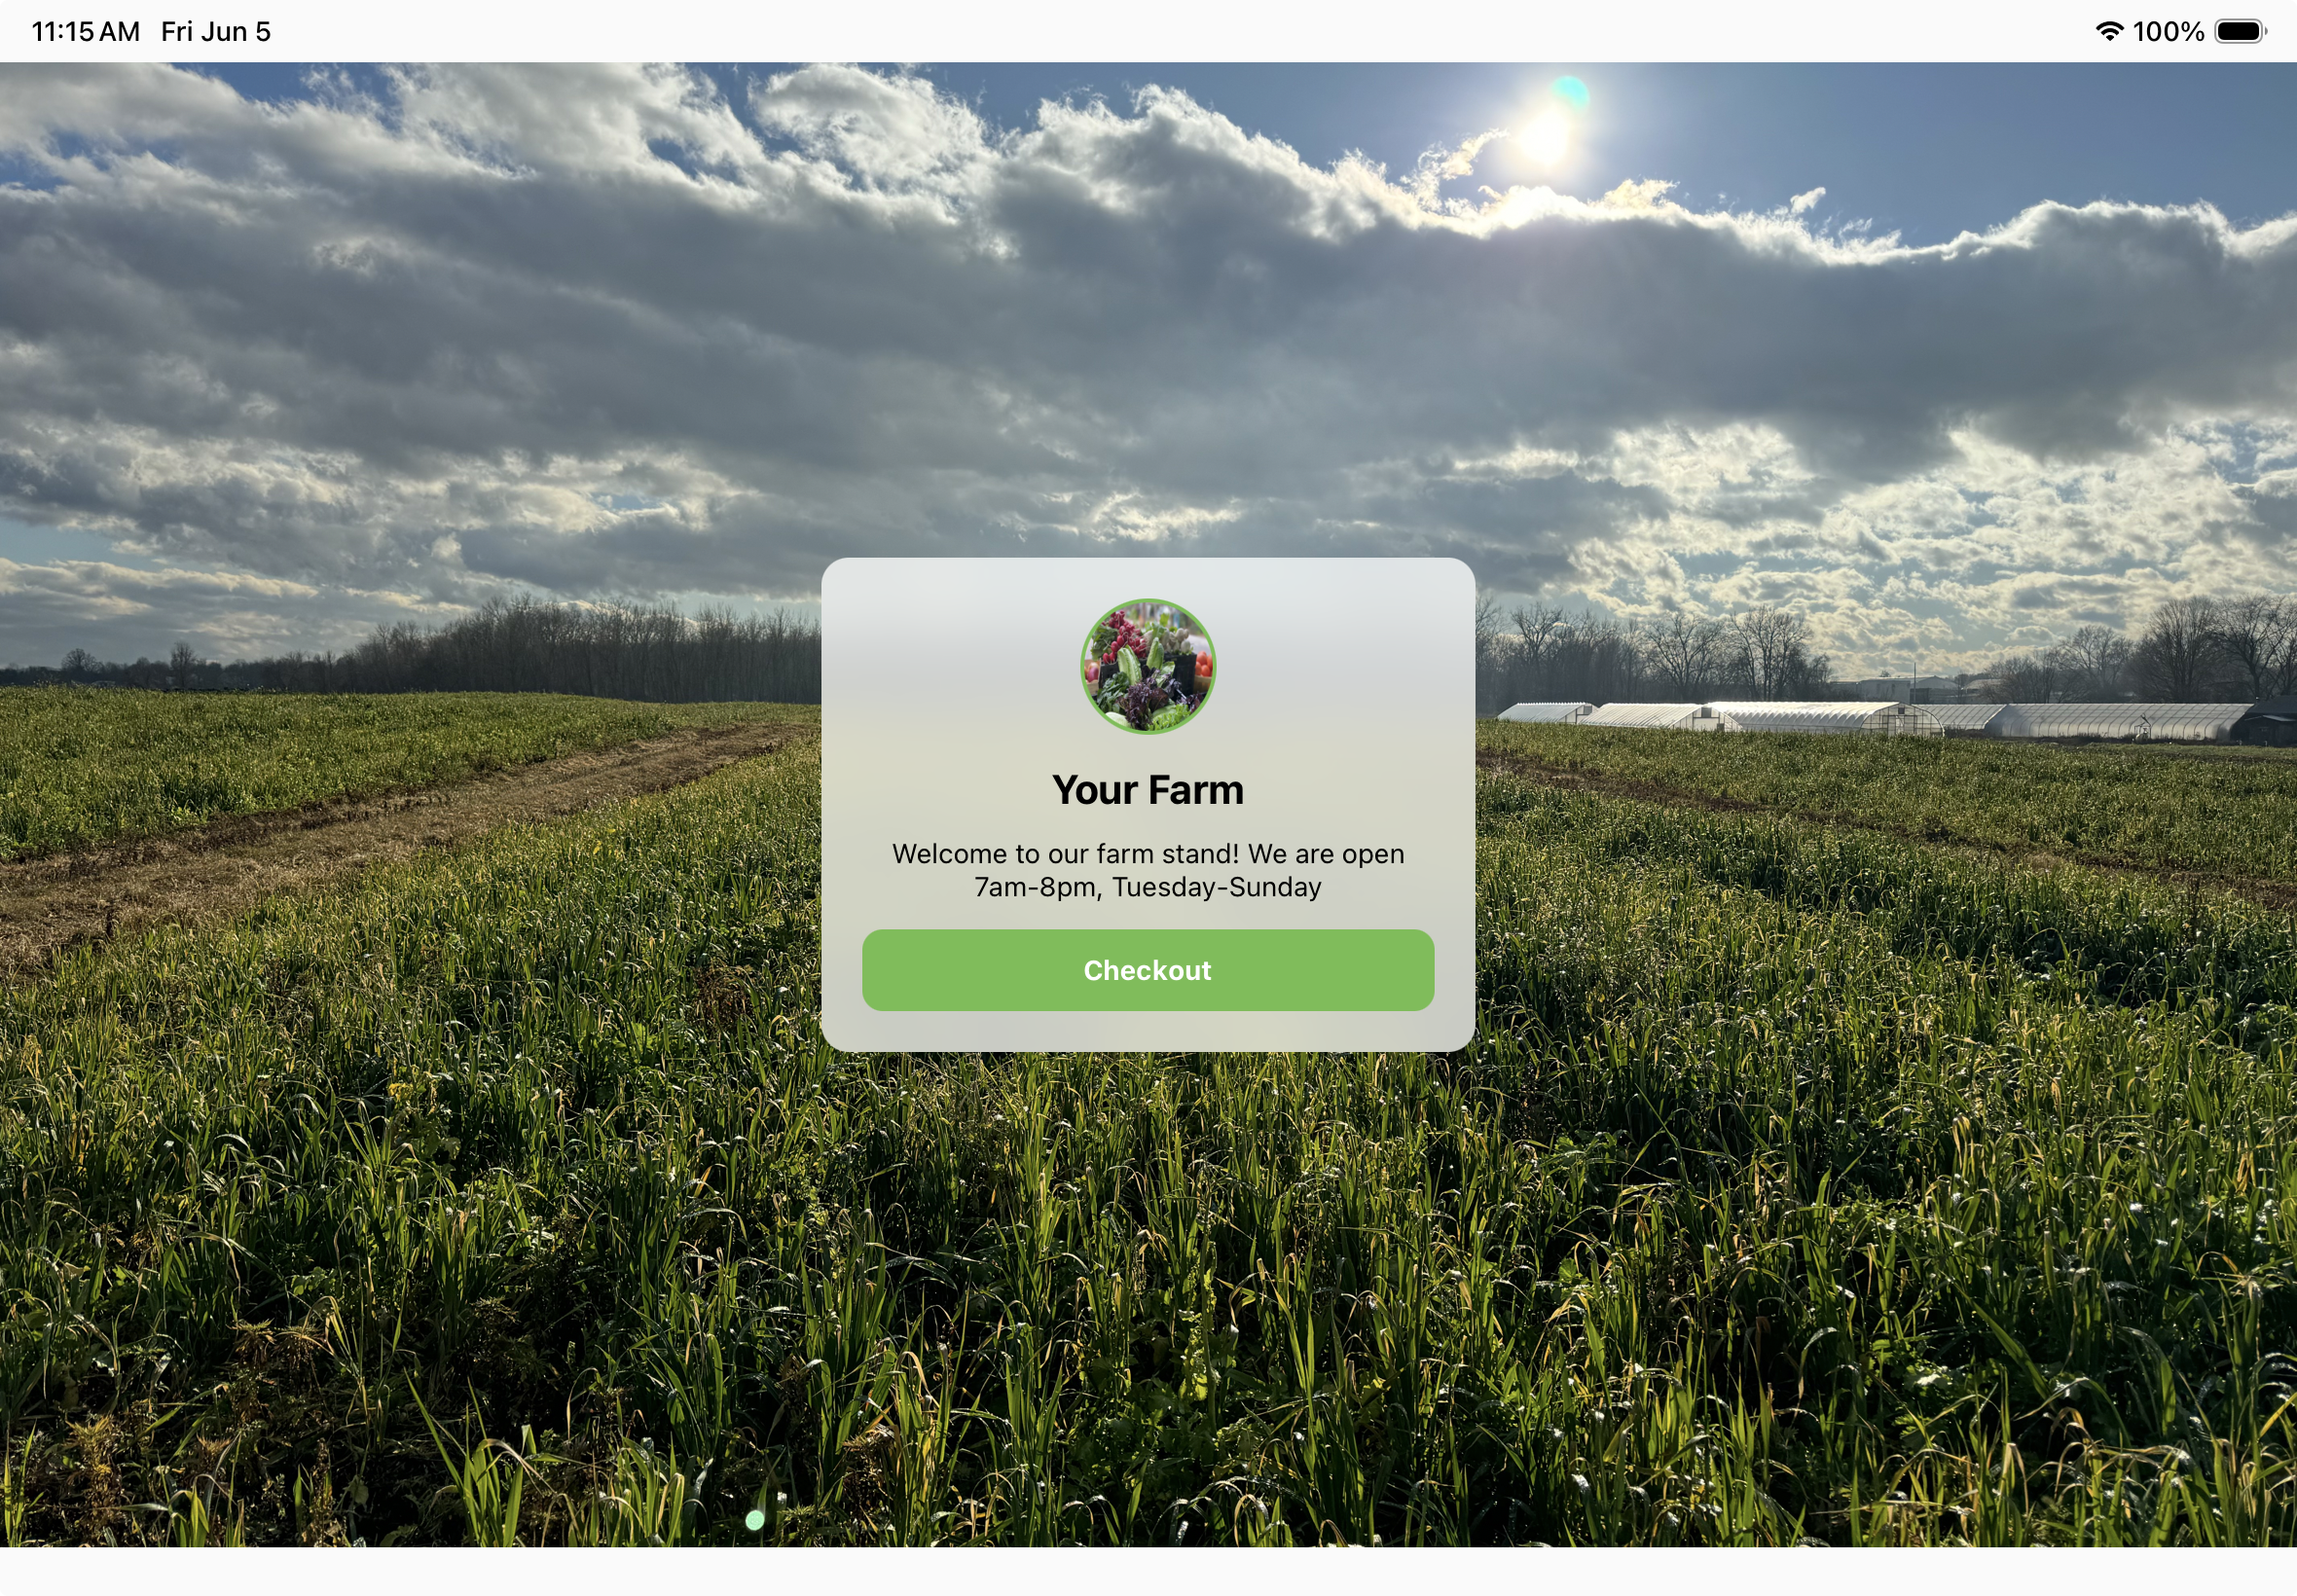
While the station is idle, it shows a full-screen screensaver with your farm's logo, name, and an optional message, plus a Checkout button. A customer taps Checkout to begin.
Connecting an account (optional)
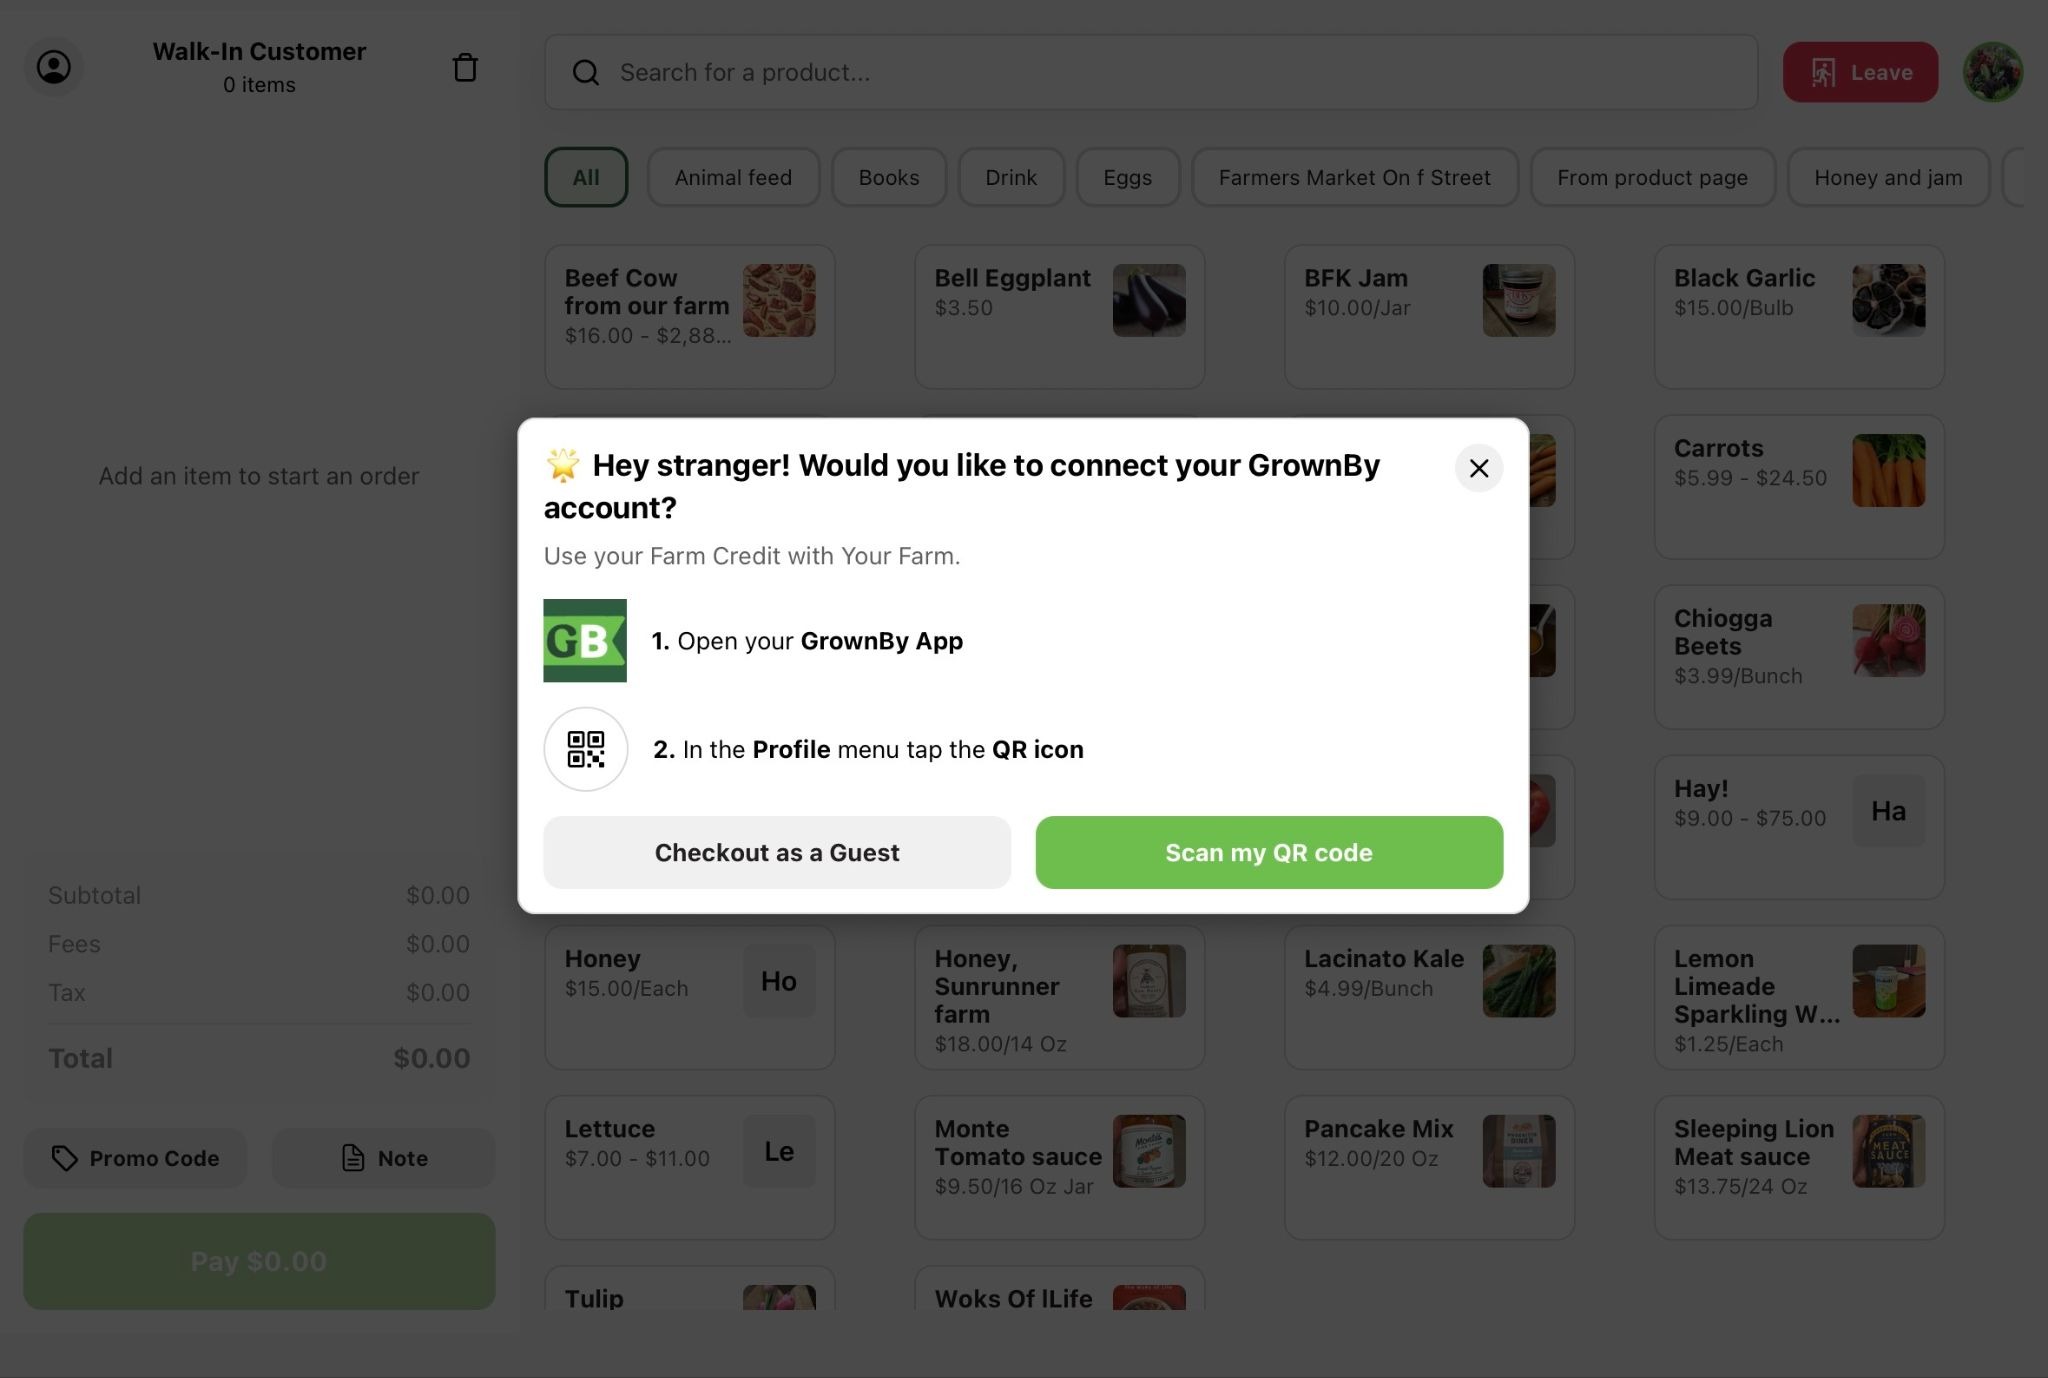
After tapping Checkout, the customer is asked whether they'd like to connect their GrownBy account so they can use Farm Credit. They can:
- Scan my QR code: open the GrownBy app, go to the Profile menu, and tap the QR icon to scan. This attaches their account to the order and allows them to use their available Farm Credit.
- Checkout as a Guest: continue without an account.
Building the cart
The customer browses your products and taps to add them to the cart. The station shows only customer-appropriate actions — the staff tools (barcode scanning, adding new products/discounts, navigating to order/invoice information) are hidden.
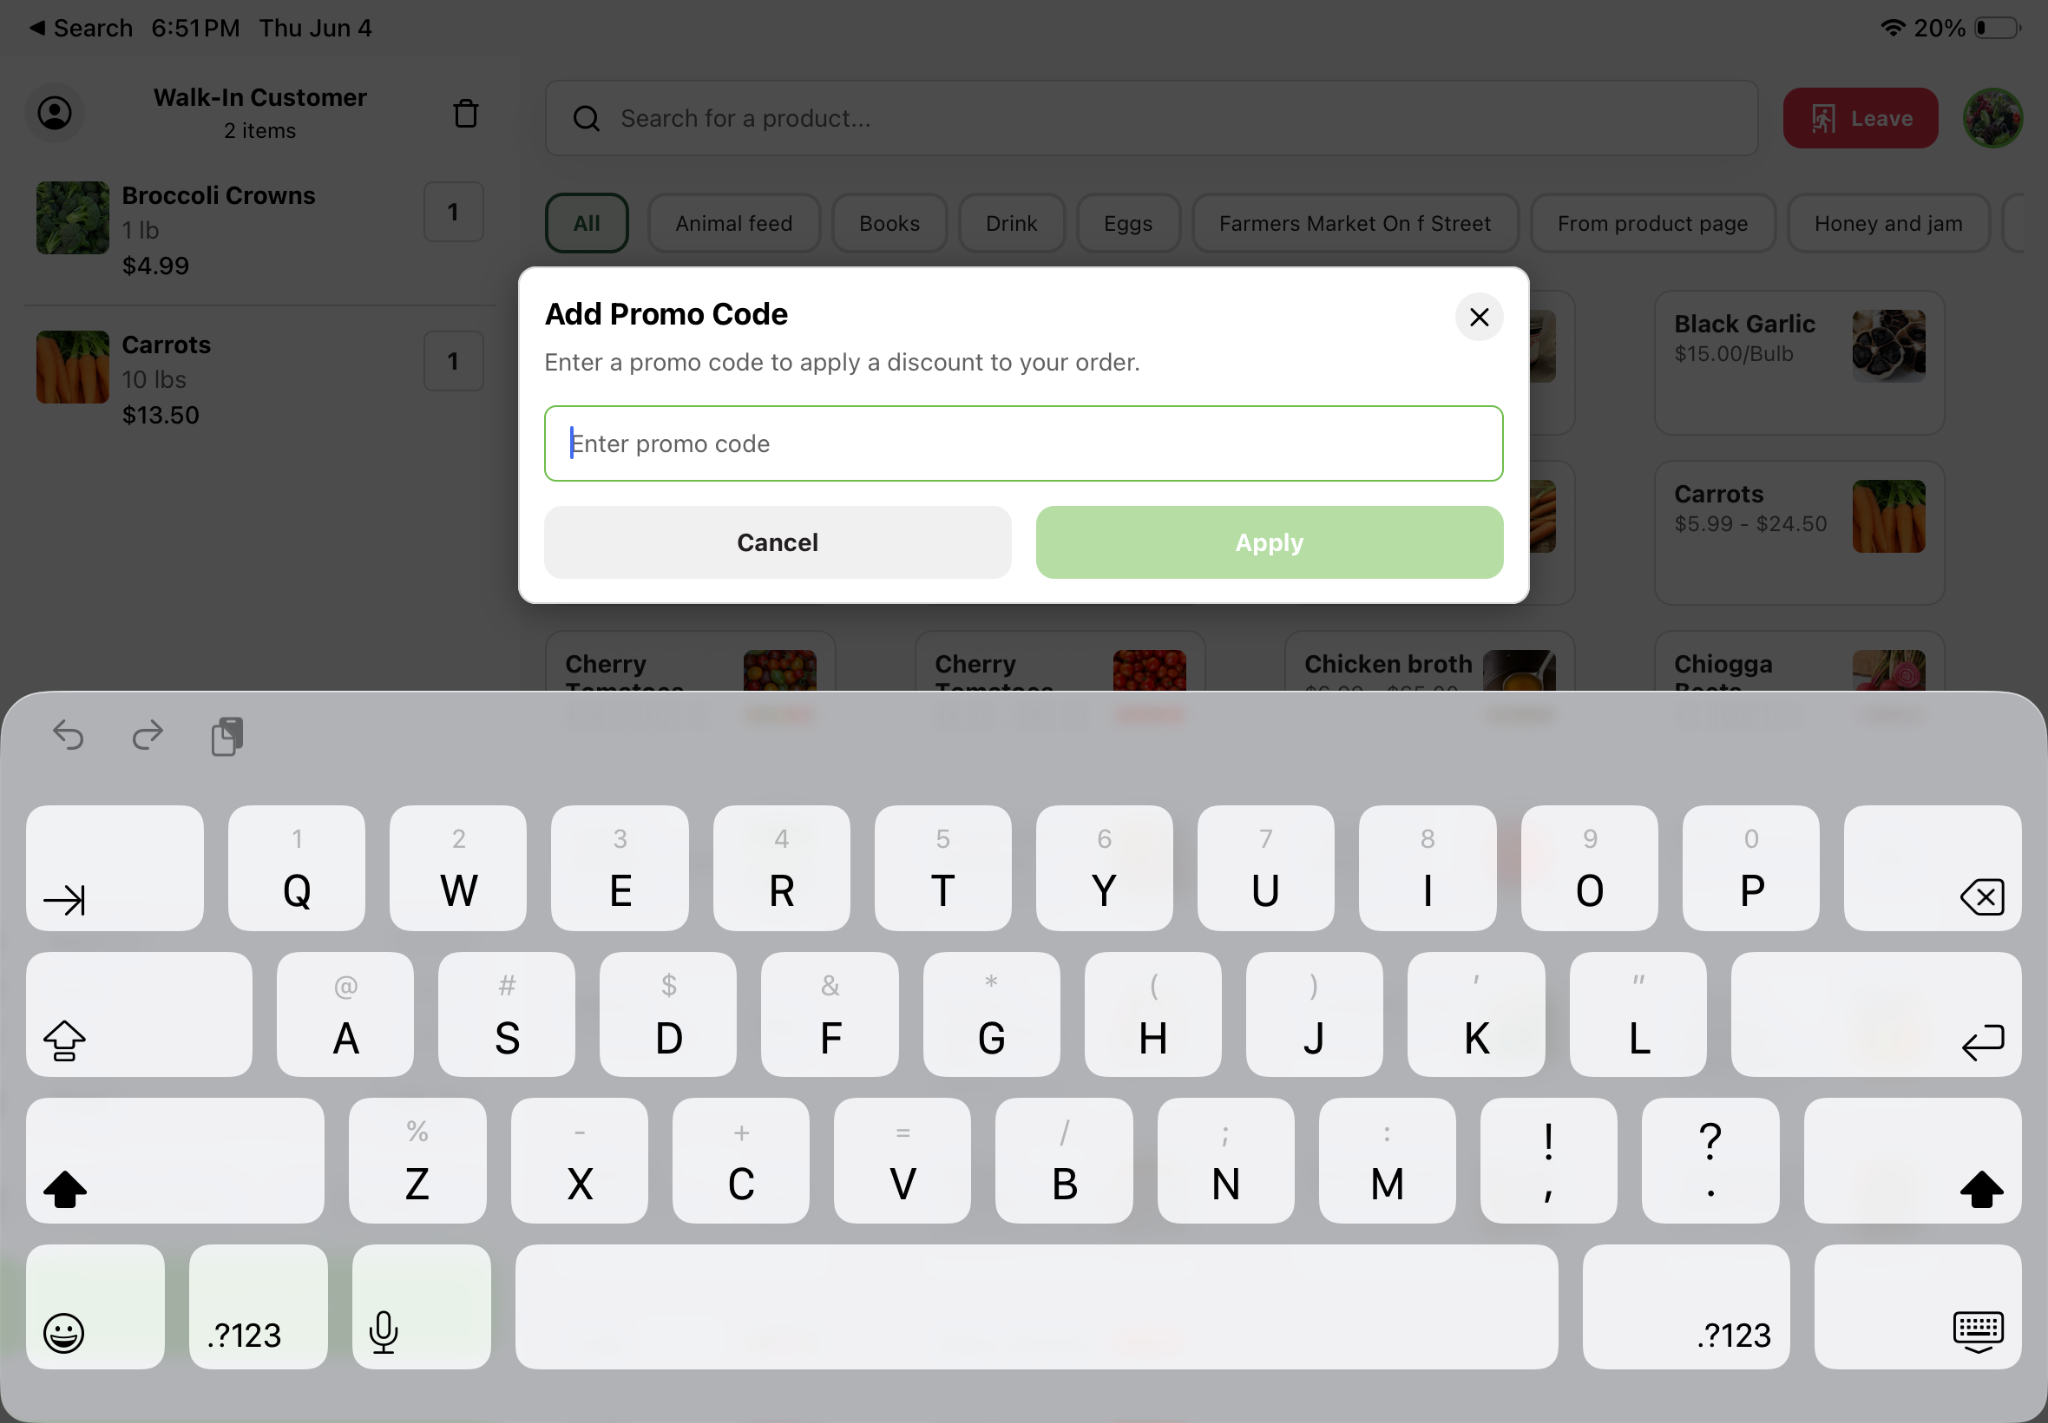
To use a promo code, the customer taps Promo Code, enters the code, and taps Apply. They can remove it again if needed.
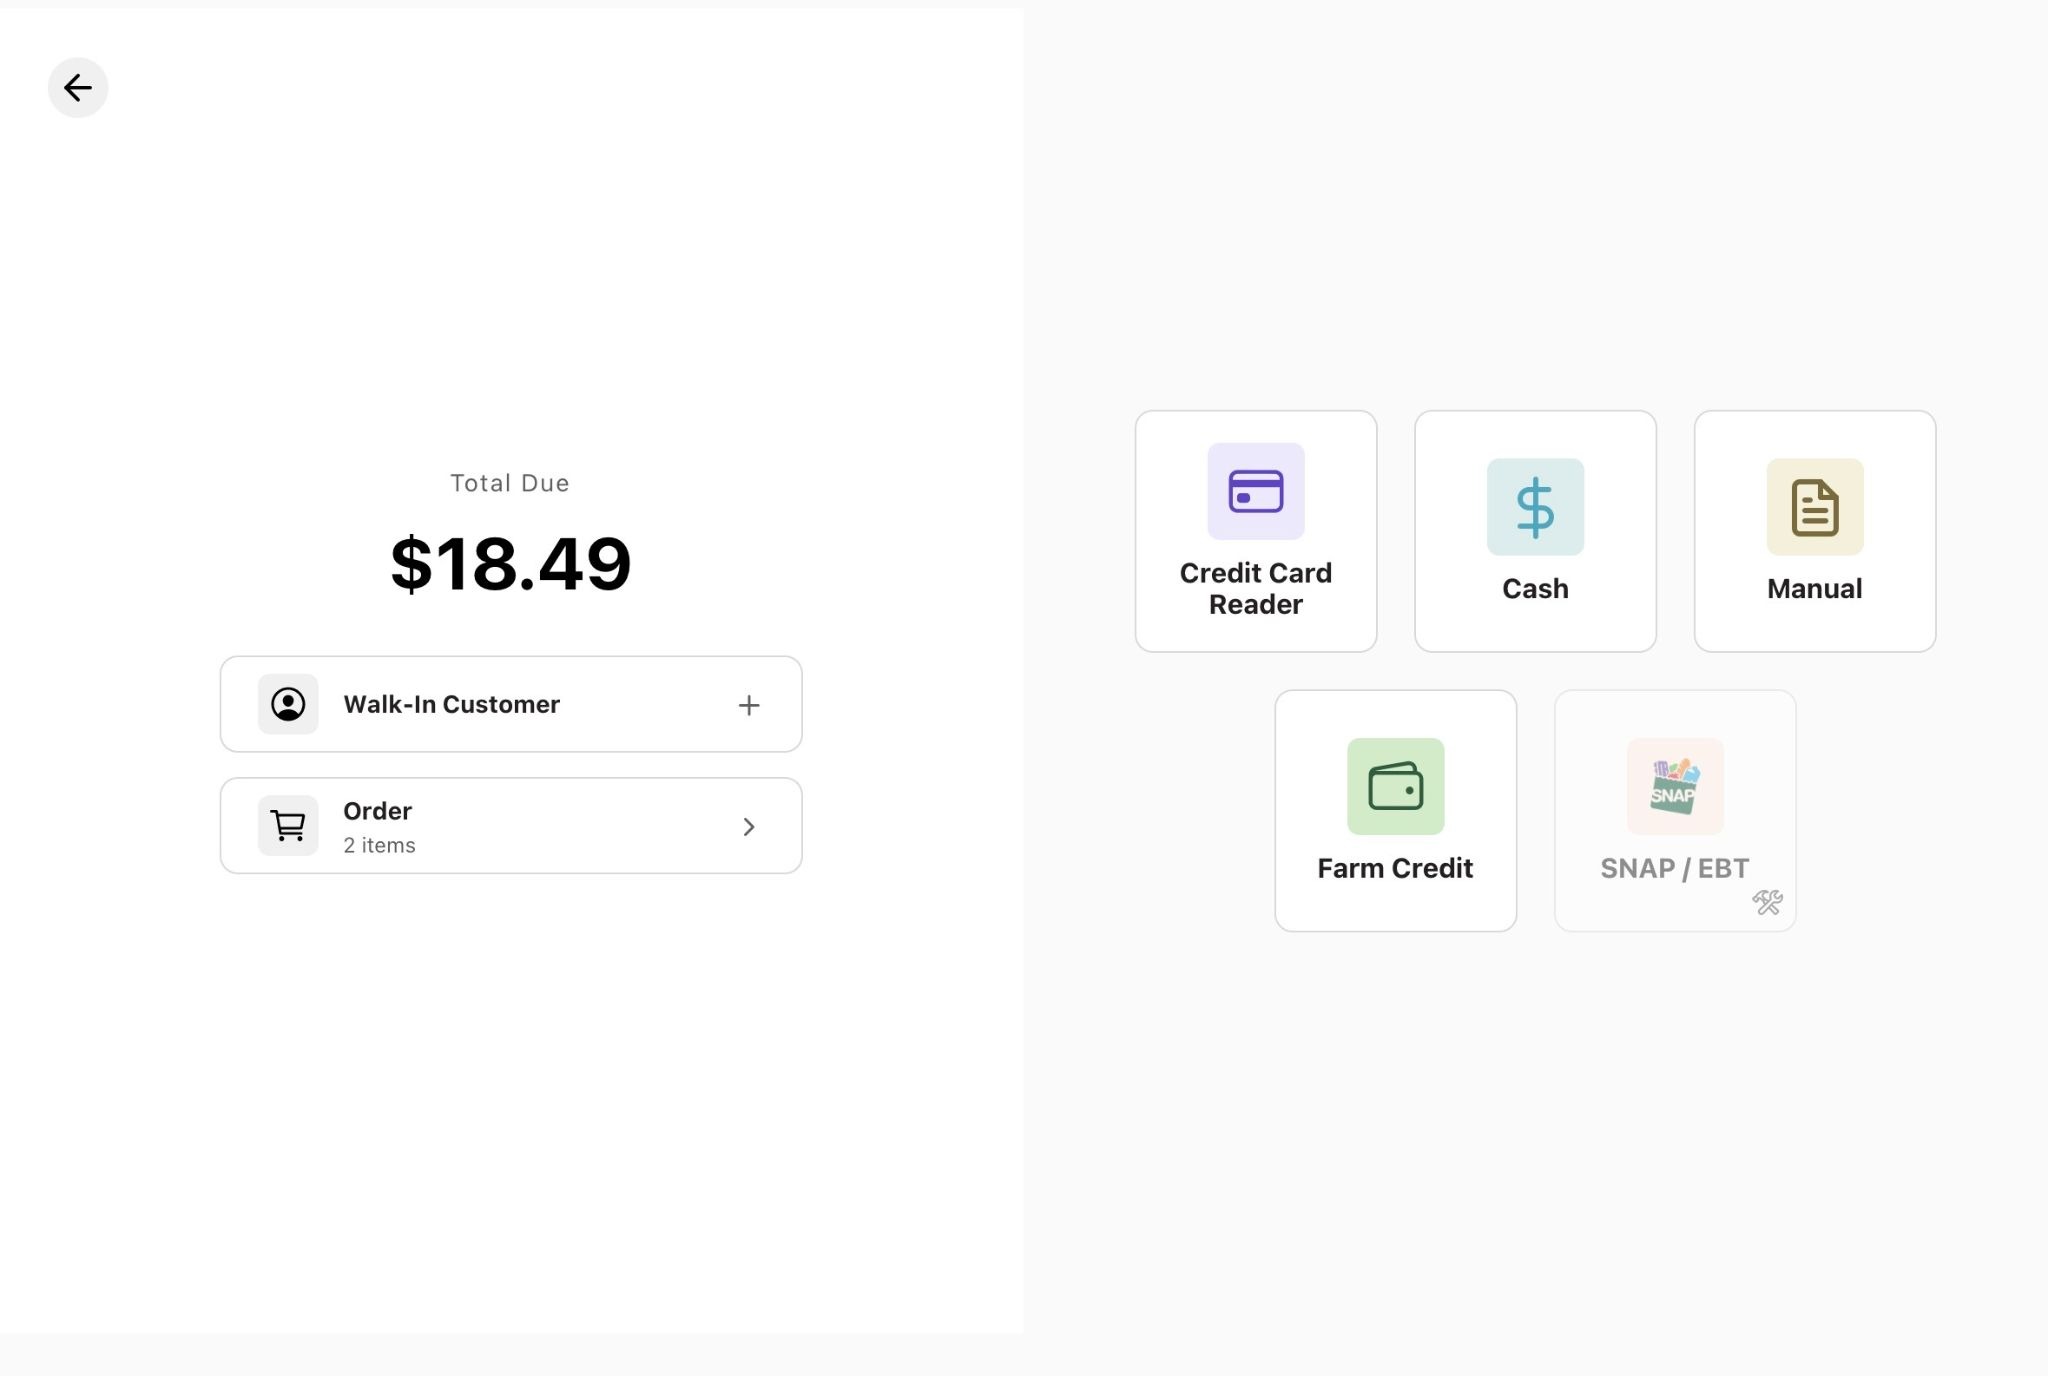
Paying
When ready, the customer taps Pay with the order total. They then choose from the payment methods you've enabled for Self-Checkout (see Configuring Self-Checkout preferences): a single card option, and optionally cash, manual payment, or Farm Credit.
- Cash (if a cash drawer is connected to the station): the customer enters the cash they're depositing, and the station shows the change due so they can make change from the drawer.
- Card: the customer taps, inserts, or swipes on the configured reader.
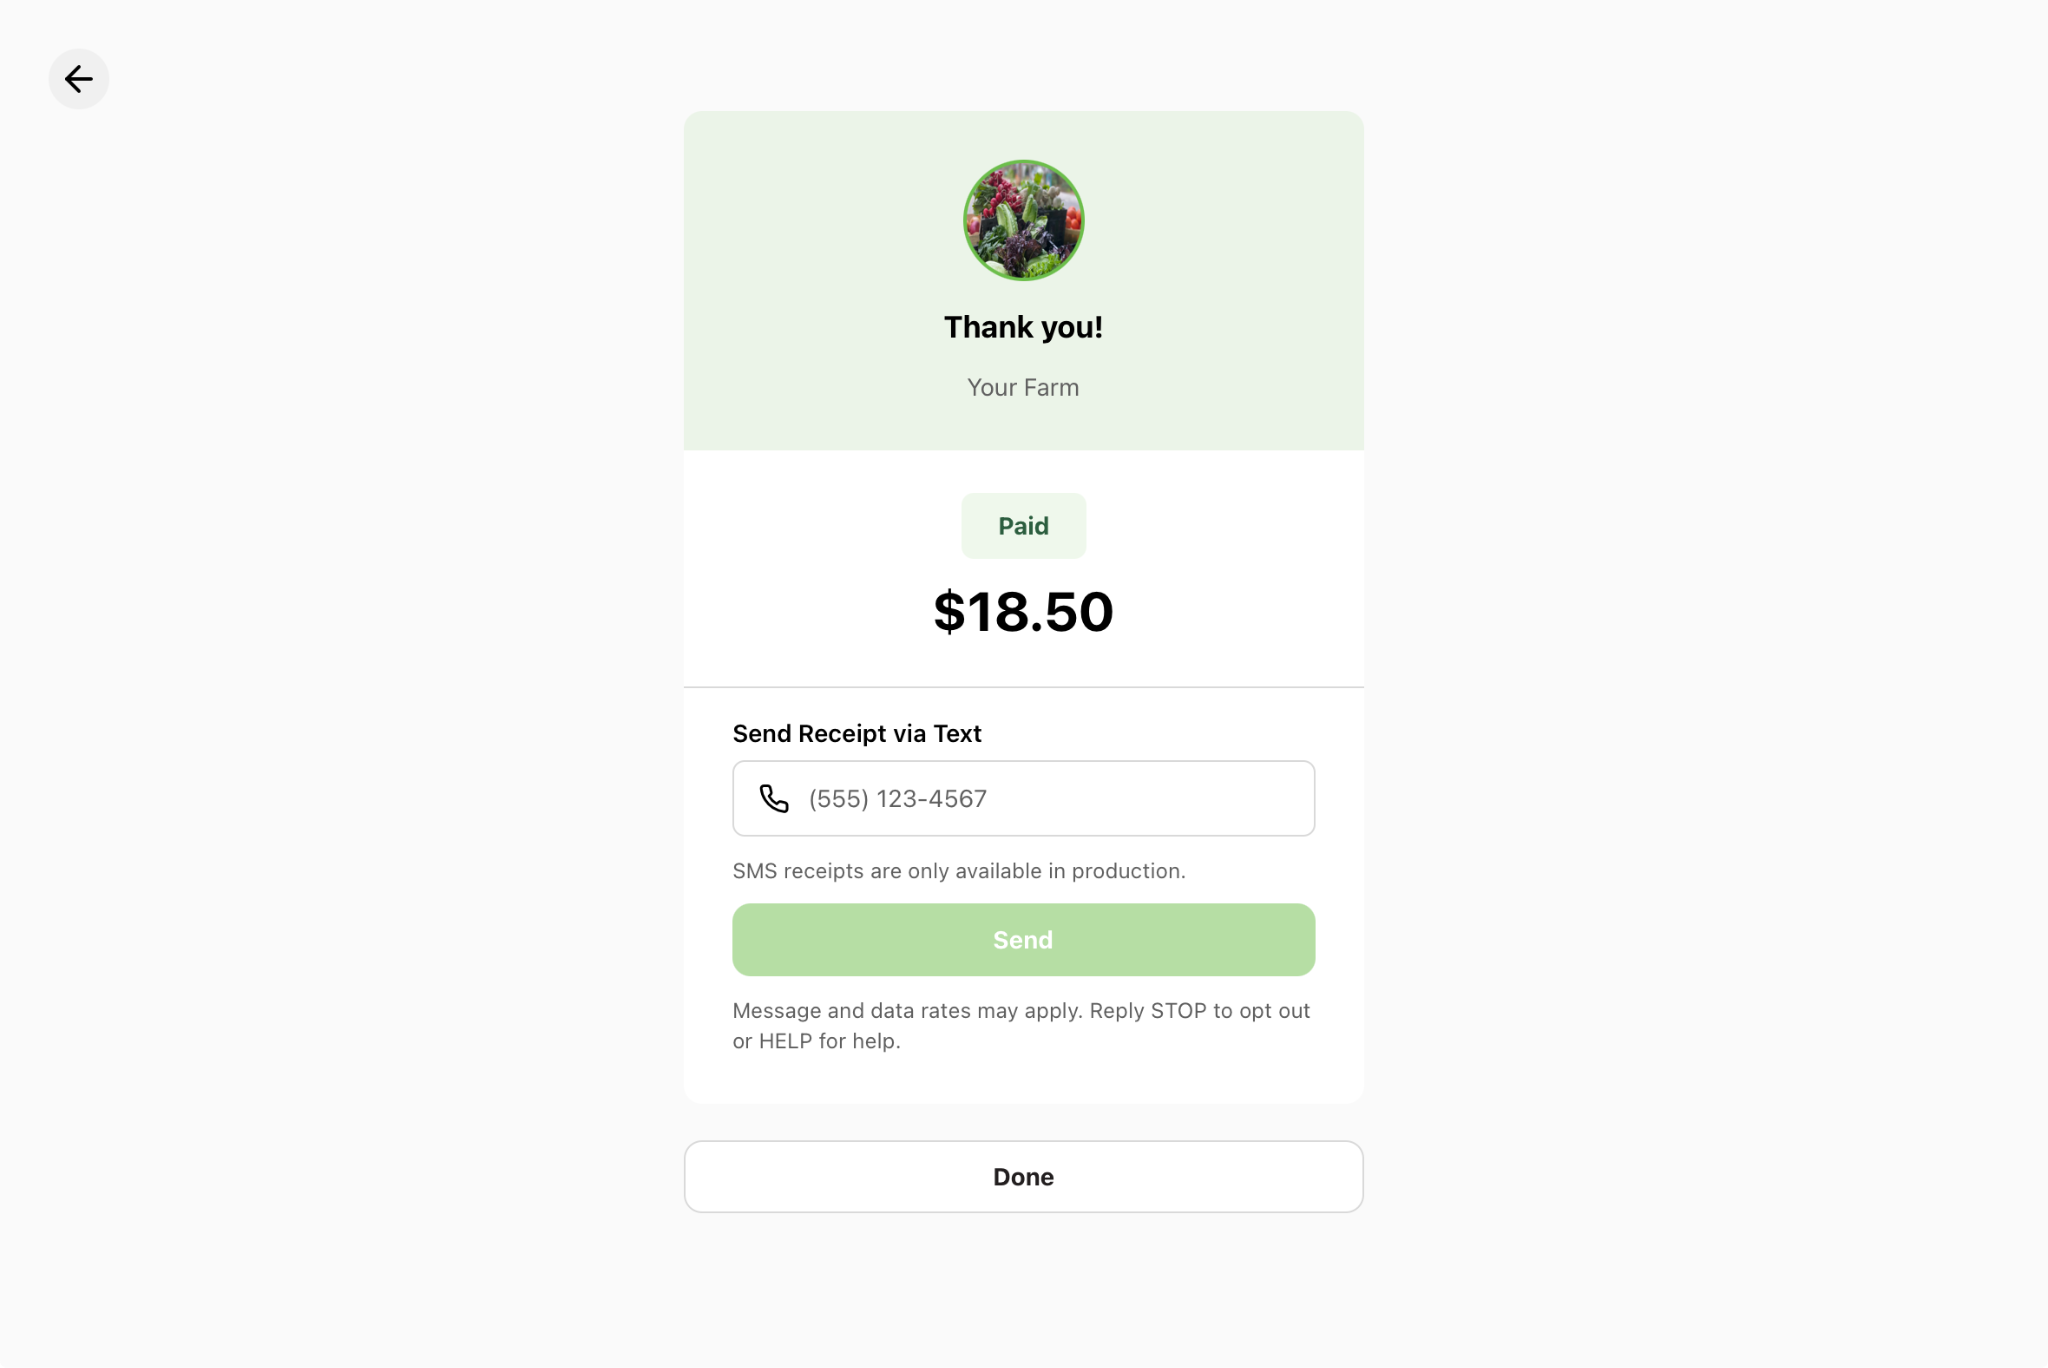
When the payment succeeds, the station shows a Thank you screen with the total and a Paid confirmation.
Receipts
On the thank-you screen, the customer can get a receipt:
- Print a receipt (if a receipt printer is connected to the station).
- Send via text: the customer enters their phone number to receive the receipt as a text message.
Tapping Done returns the station to the screensaver, ready for the next customer.
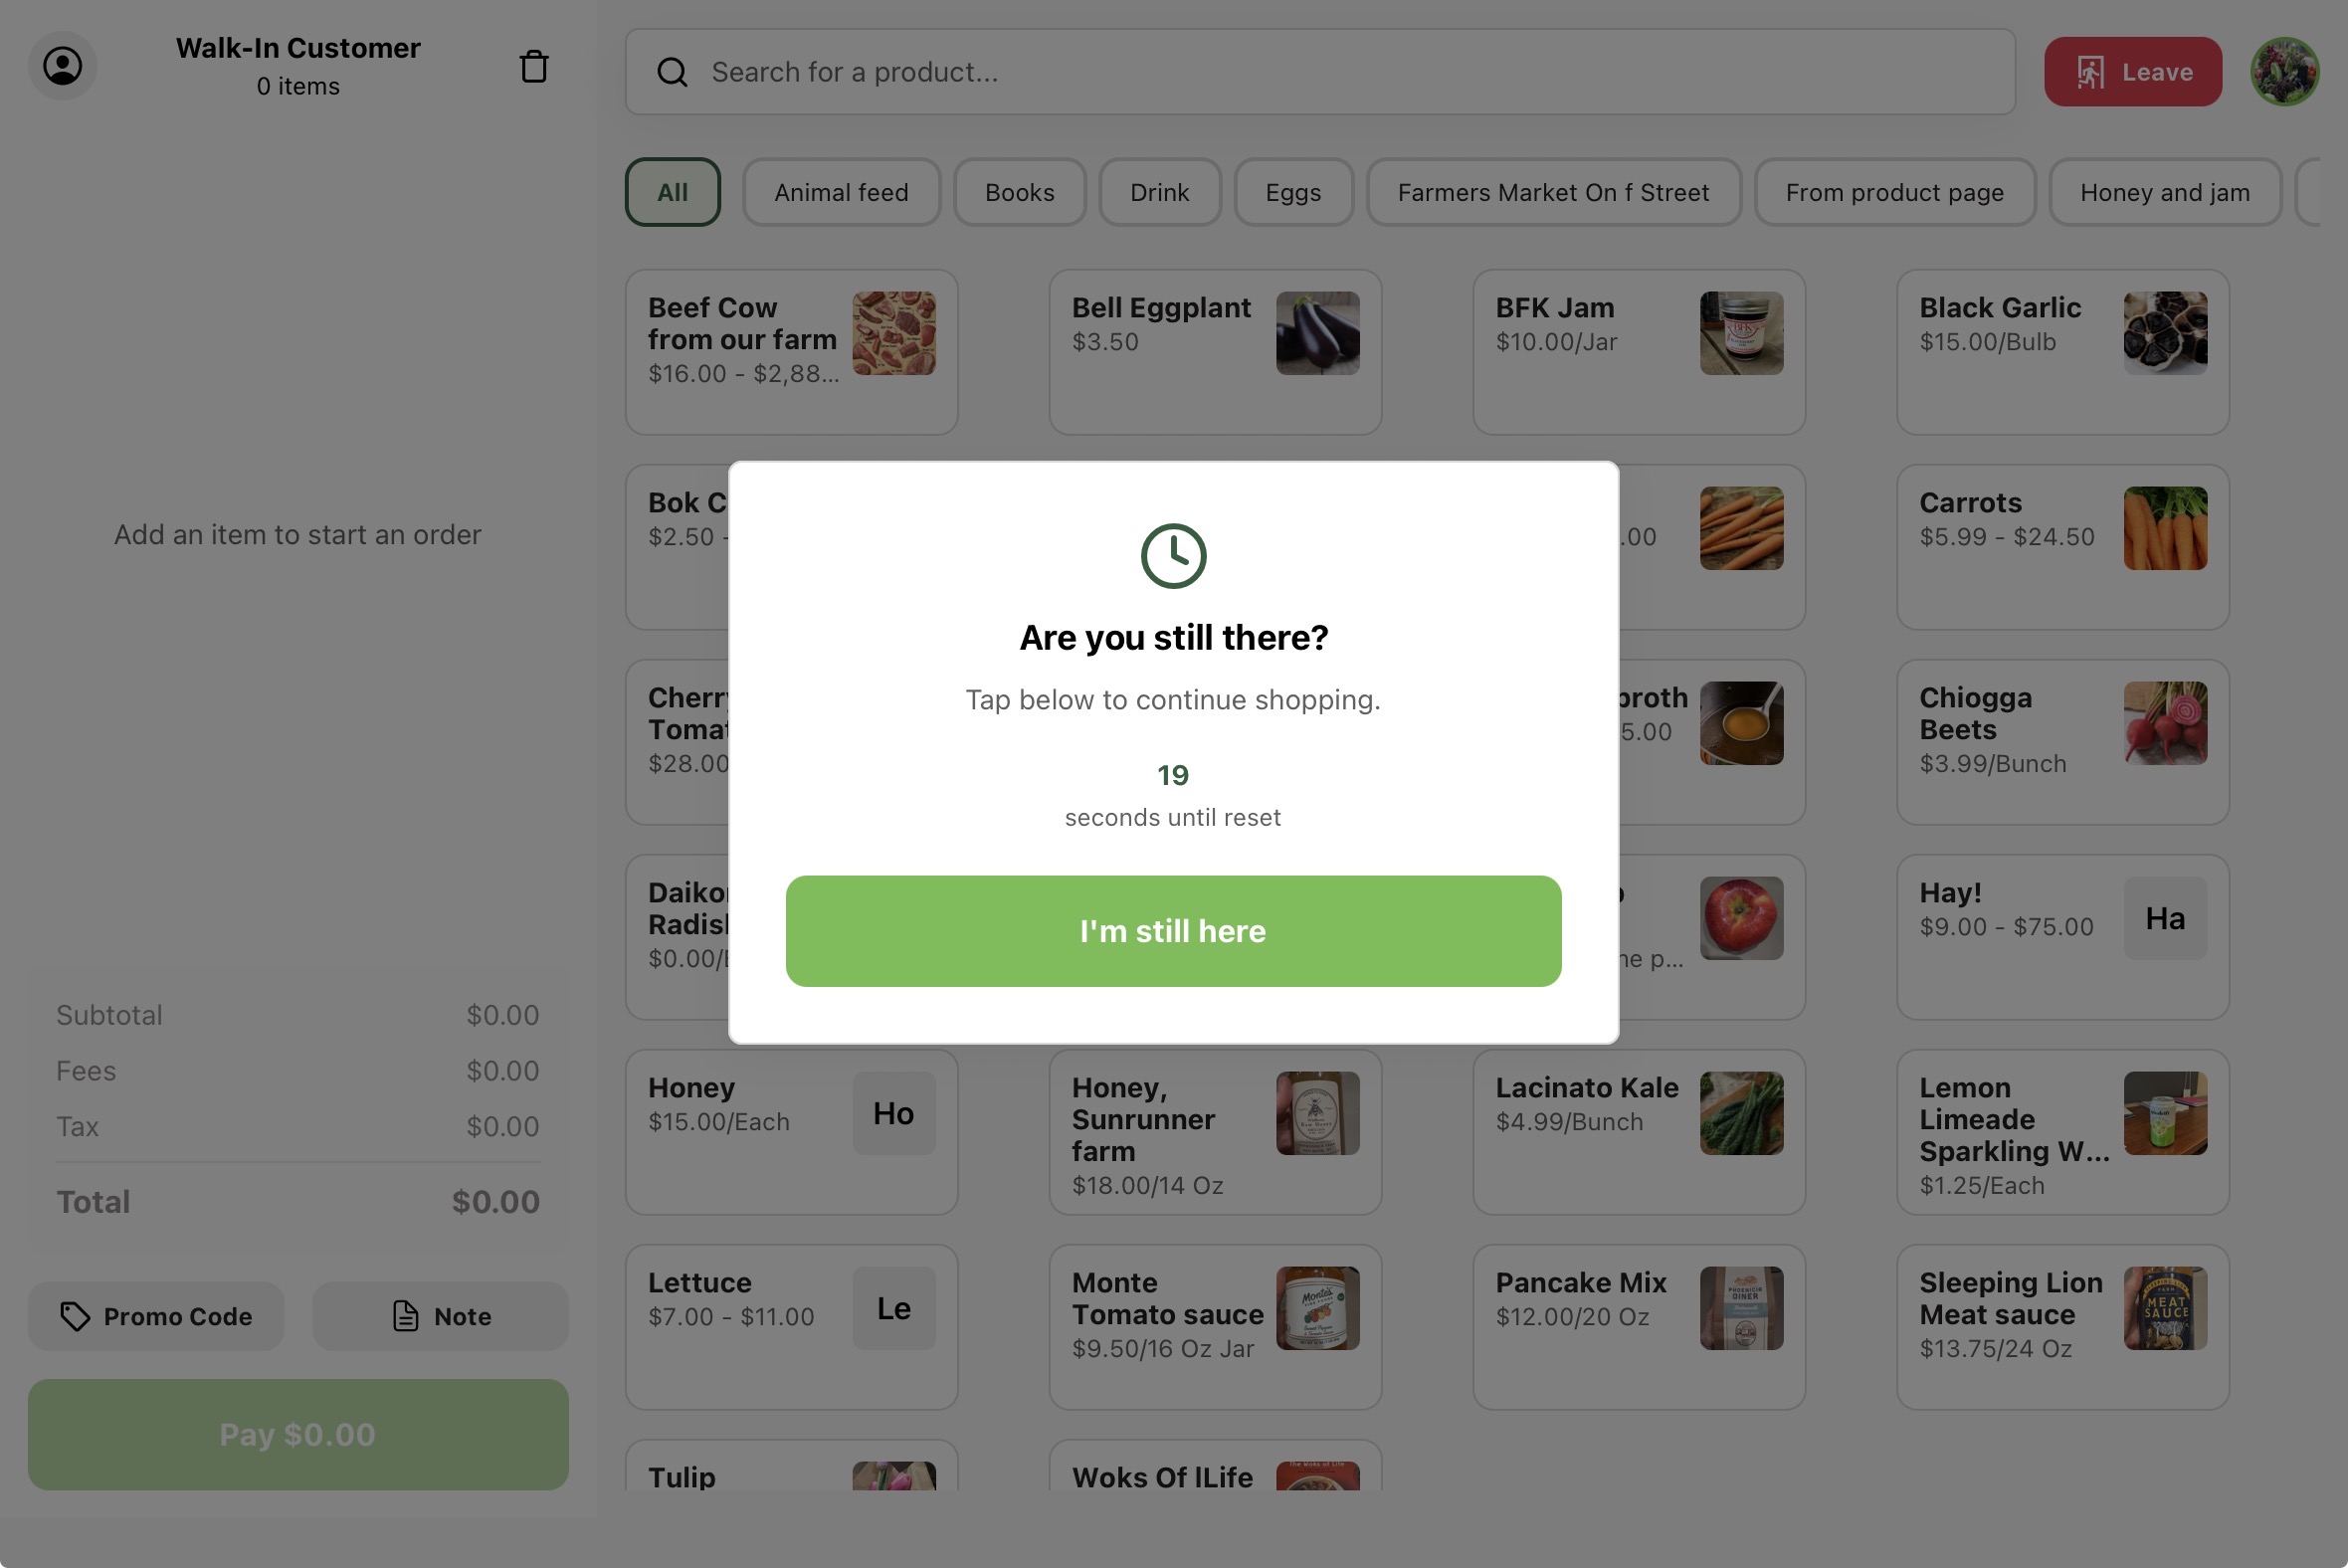
If a customer walks away