Self-Checkout turns a Register device into an unattended station where customers ring up their own purchases — useful for a farm store, a self-serve farm stand, or a busy market table where staff can't always be at the register. You lock the device to the GrownBy Register app, create a PIN that staff use to step back out, and customers do the rest.
For a step-by-step tutorial to set up Self-Checkout on Register, check out this video:
Before you start
- Decide which device will live at the Self-Checkout station. The setup locks that device to the GrownBy Register app, so it's best to use a dedicated tablet or phone rather than your everyday device.
- Have a payment method ready to offer customers. You'll choose how customers pay during setup — see Configuring Self-Checkout preferences.
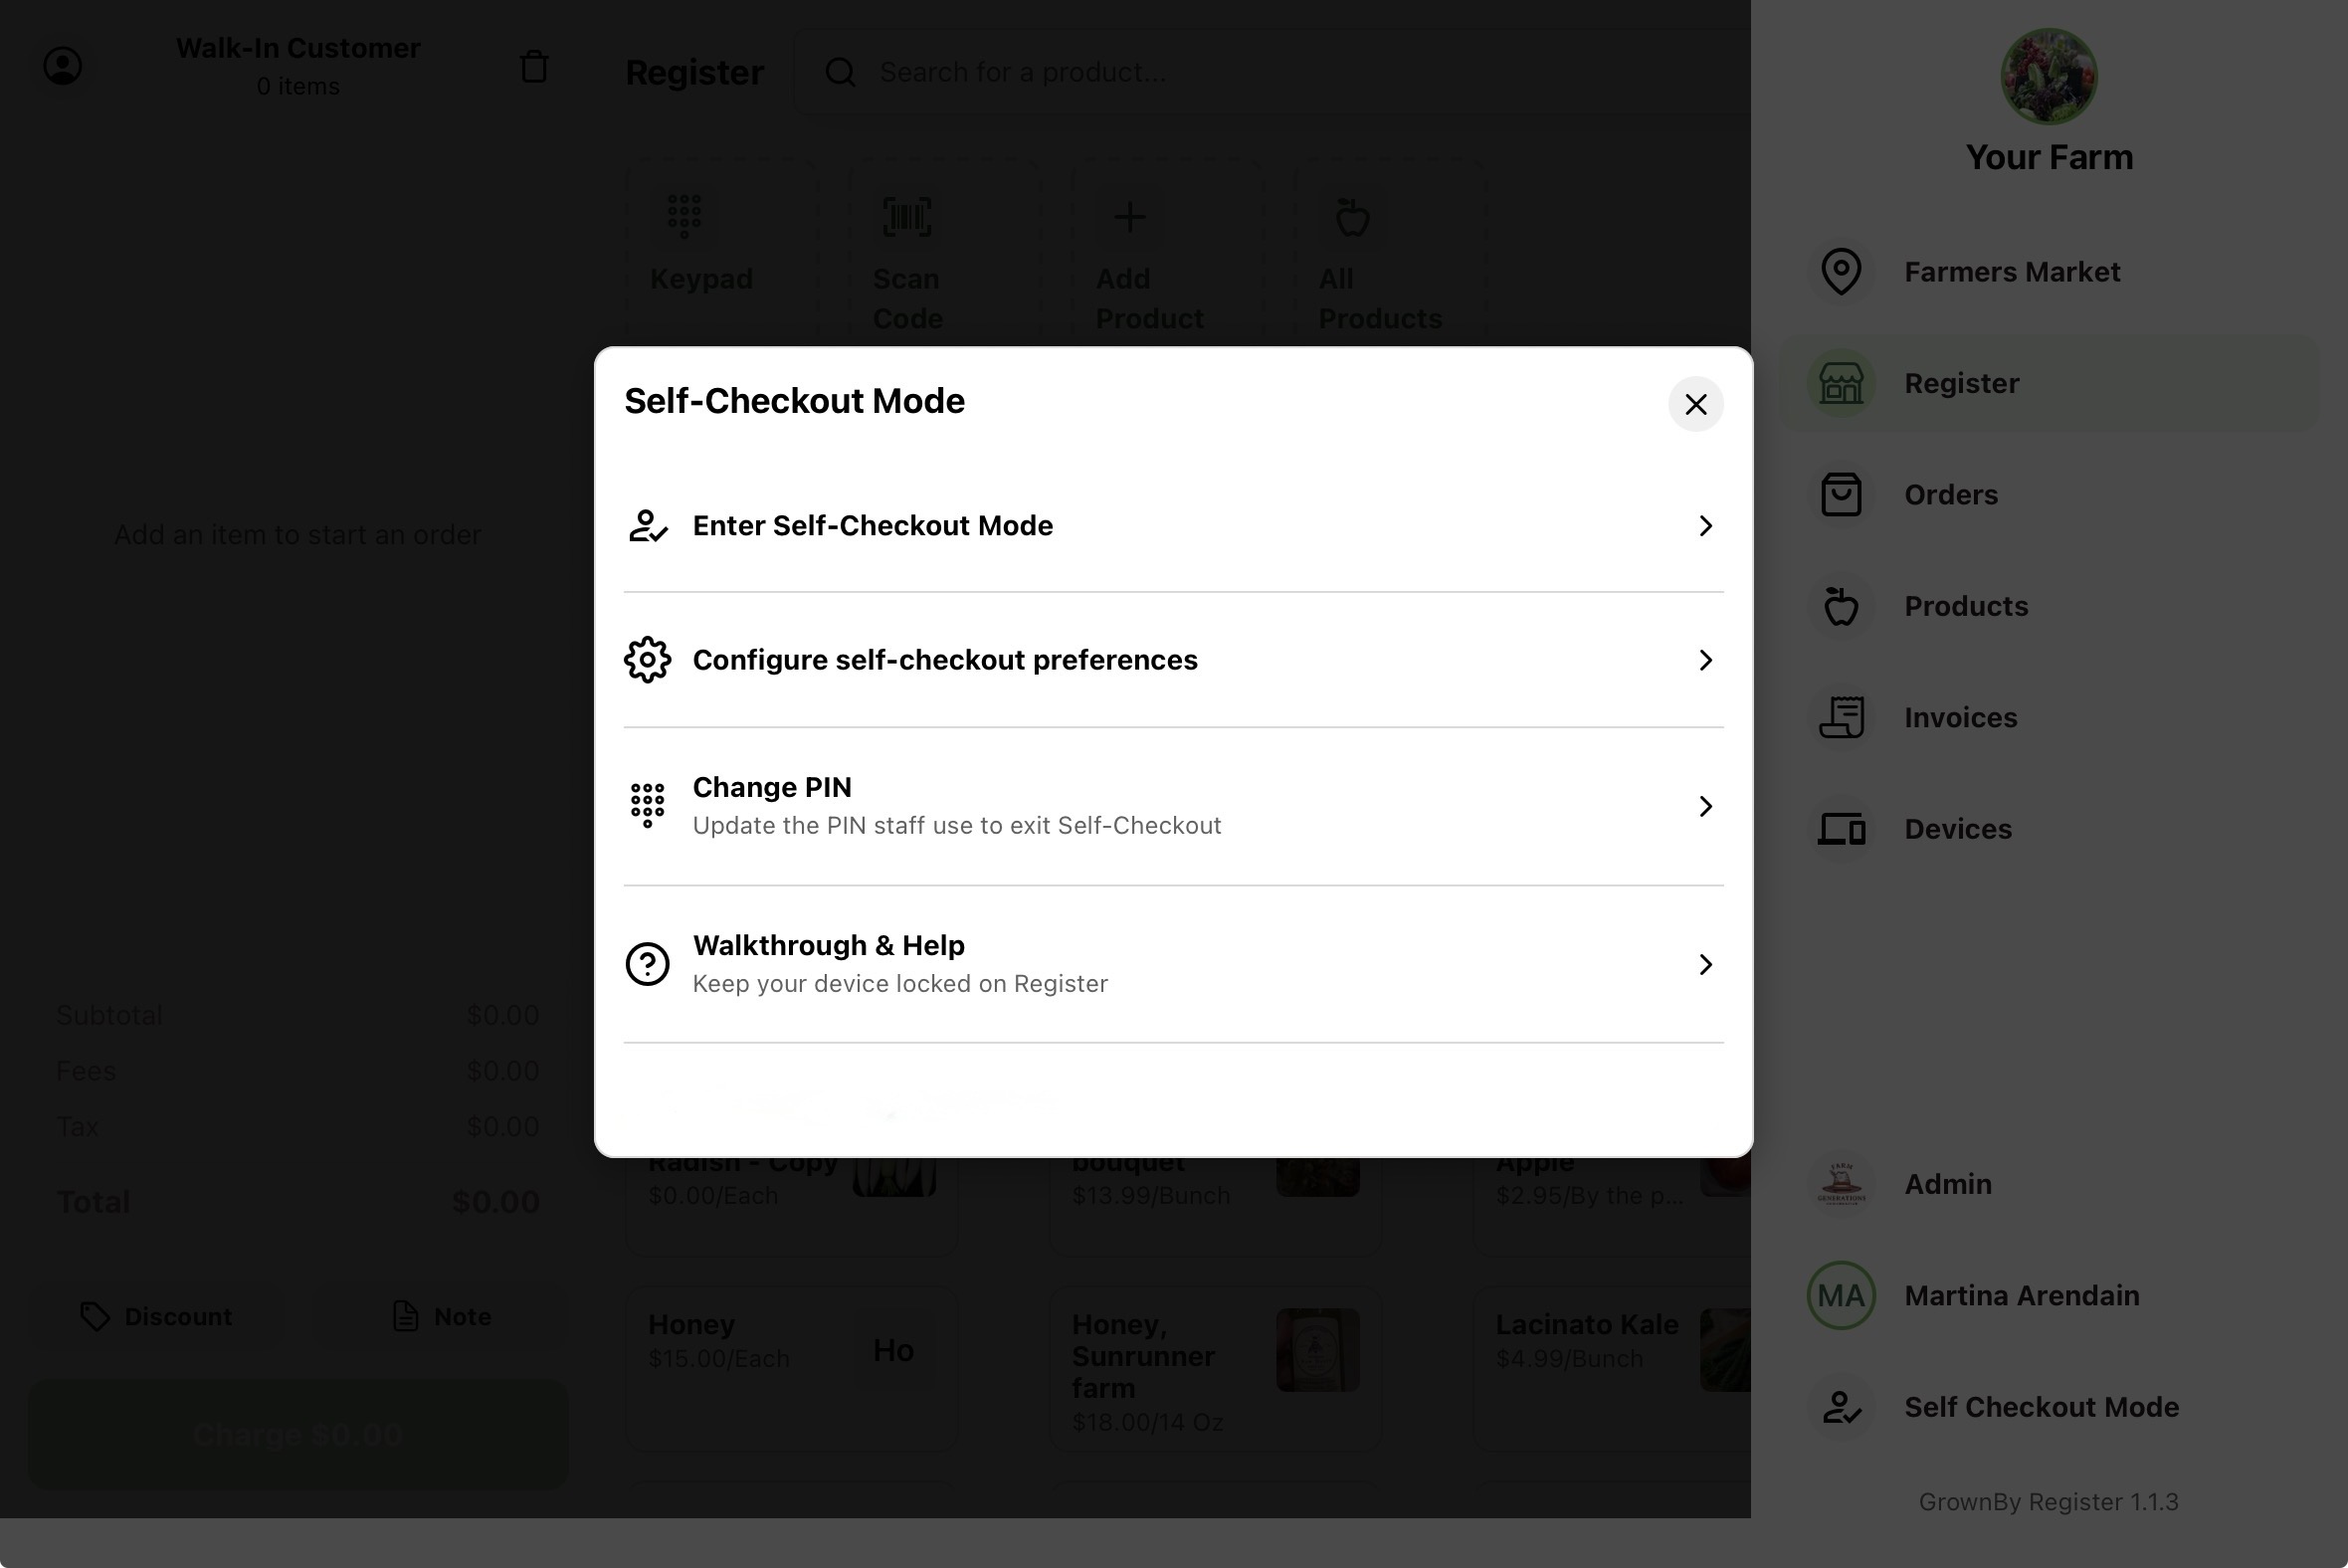
Open Self-Checkout
In Register, open the menu by clicking on your farm logo in the top right and tap Self Checkout Mode. The first time you do this, GrownBy launches a short guided walkthrough. After setup is complete, the same button opens the Self-Checkout hub instead.
The intro screen, Enable Self-Checkout Mode, explains the three things setup takes care of: locking the device so customers can't leave the app, creating a PIN so only staff can exit, and keeping the screen on during a session. Tap Get started to begin.
Step 1 — Lock the device
The first step turns on your device's built-in app lock so a customer can't leave Register, press the Home button, or switch to another app.
- On iPhone or iPad, this is Guided Access (Settings → Accessibility → Guided Access). The walkthrough also has you set a Guided Access passcode and, optionally, enable Face ID or Touch ID so you can exit faster.
- On Android, this is App Pinning (Settings → Security and privacy → More security settings). Turn on app pinning and enable the option to require your screen lock to unpin.
Each step has a Go to Settings button that takes you to the right place. Follow the on-screen instructions, then come back to GrownBy and tap Continue.
The walkthrough is three steps on iPhone and iPad (turn on Guided Access, set your access passcode, start the session) and two steps on Android (turn on App Pinning, pin the app). GrownBy reminds you how to start the lock each time you enter Self-Checkout, so you don't have to memorize it.
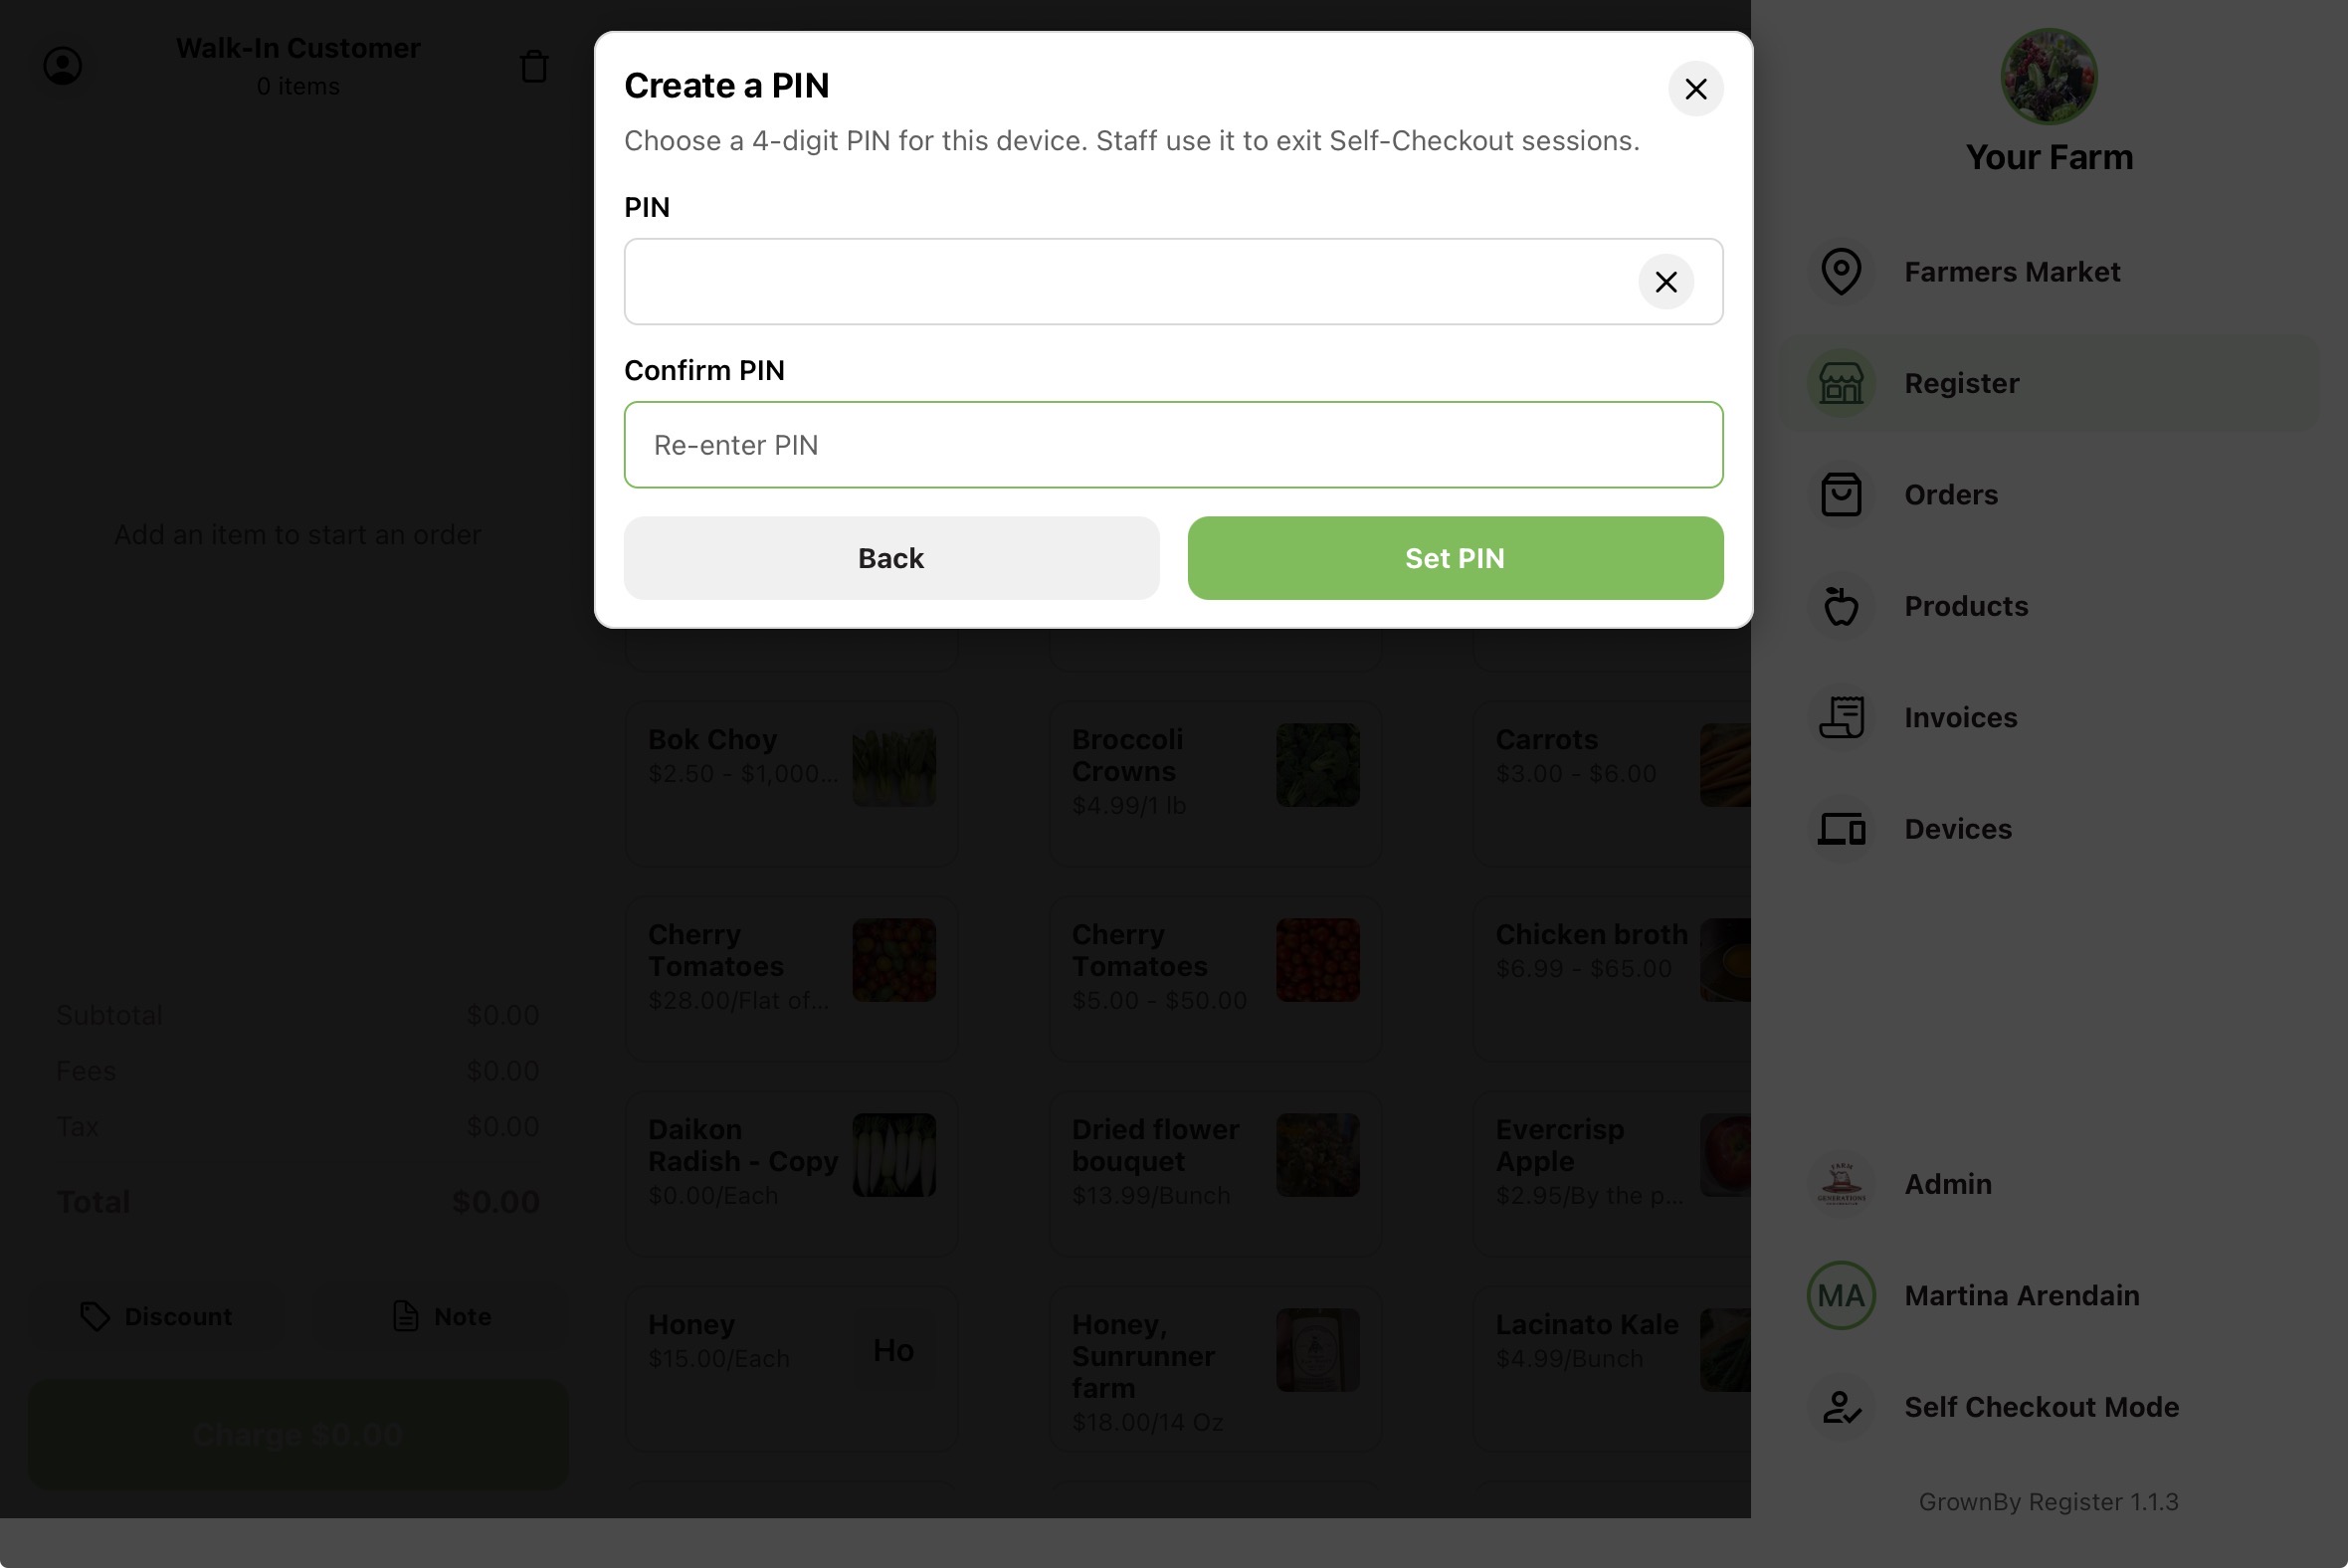
Step 2 — Create your exit PIN
Next, choose a 4-digit PIN. Staff use this PIN to exit a Self-Checkout session and get back to the normal Register. Enter it twice to confirm.
The PIN is stored on that device for your farm. You can change it later from the Self-Checkout hub (see below).
After you set the PIN, the first-time walkthrough takes you straight into choosing how customers pay. Those options are covered in Configuring Self-Checkout preferences.
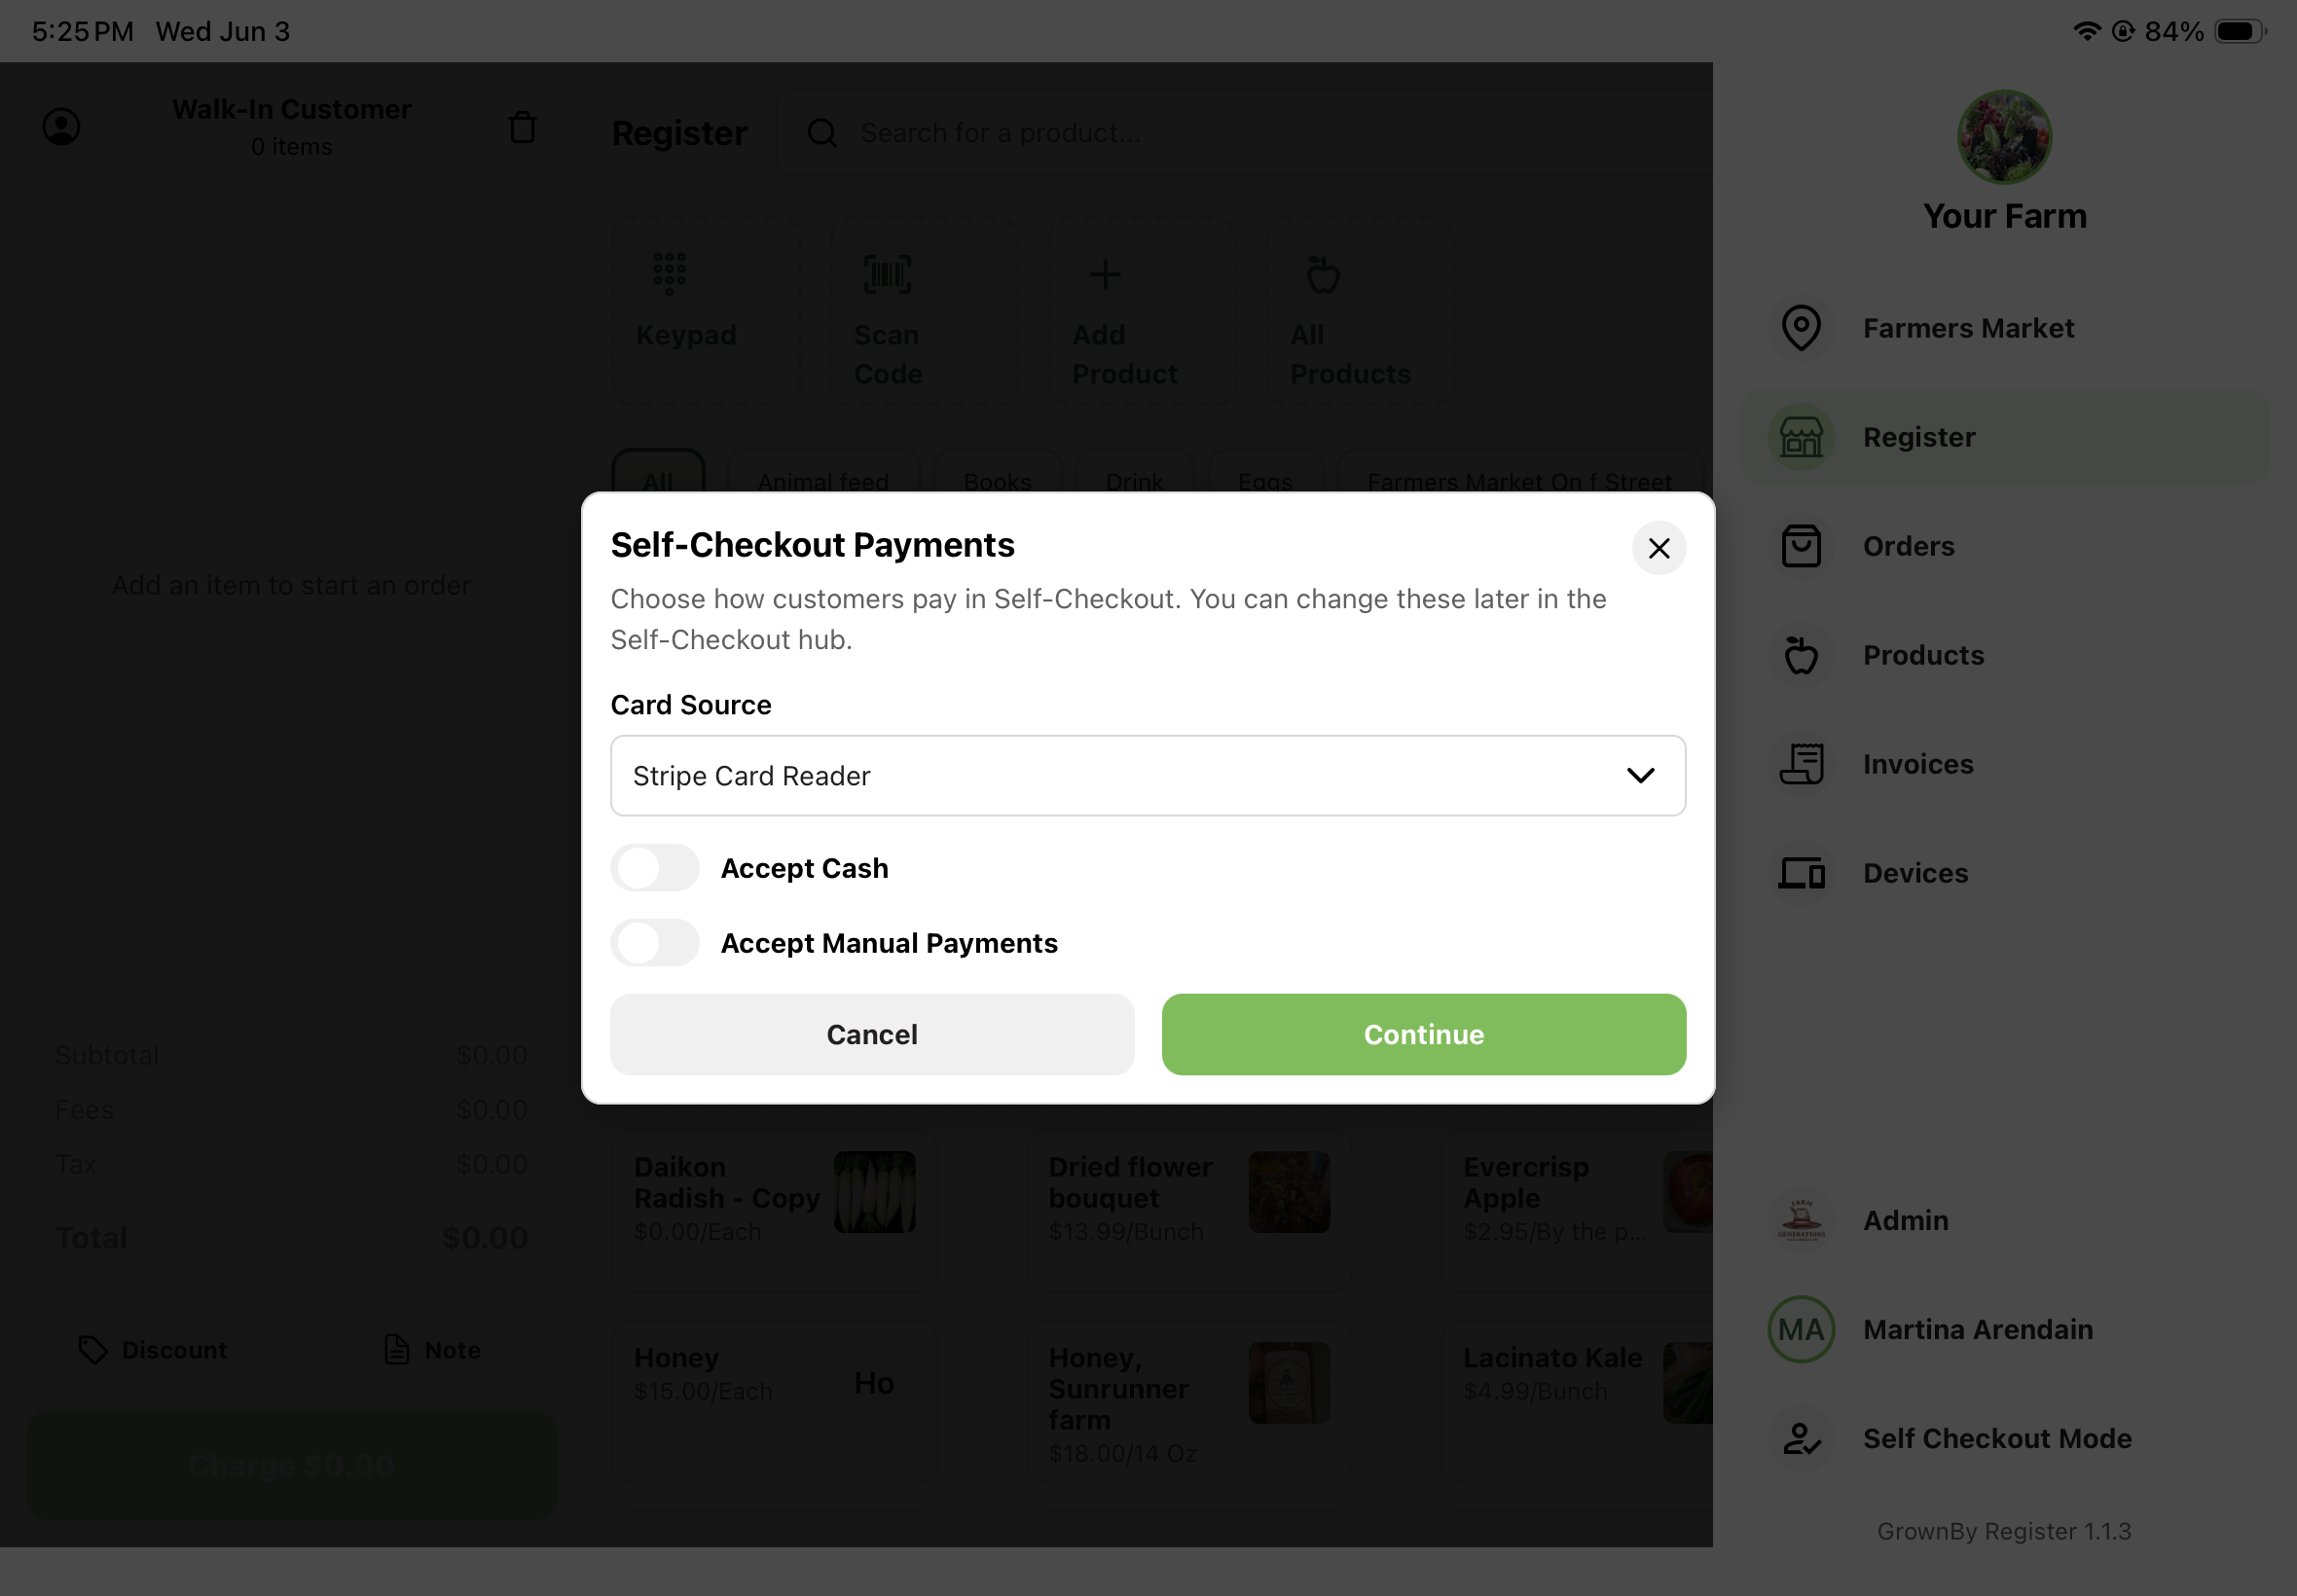
Step 3 — Self-Checkout Payments
You will be prompted to select how you want to process credit card payments. The available options are Tap to Pay (when supported on your device), Stripe Card Reader, and Fortis Card Reader. Customers will only be able to pay using the selected processing method when they check out.
There is also an option to accept cash and manual payments (other payments like check, vouchers, etc.).
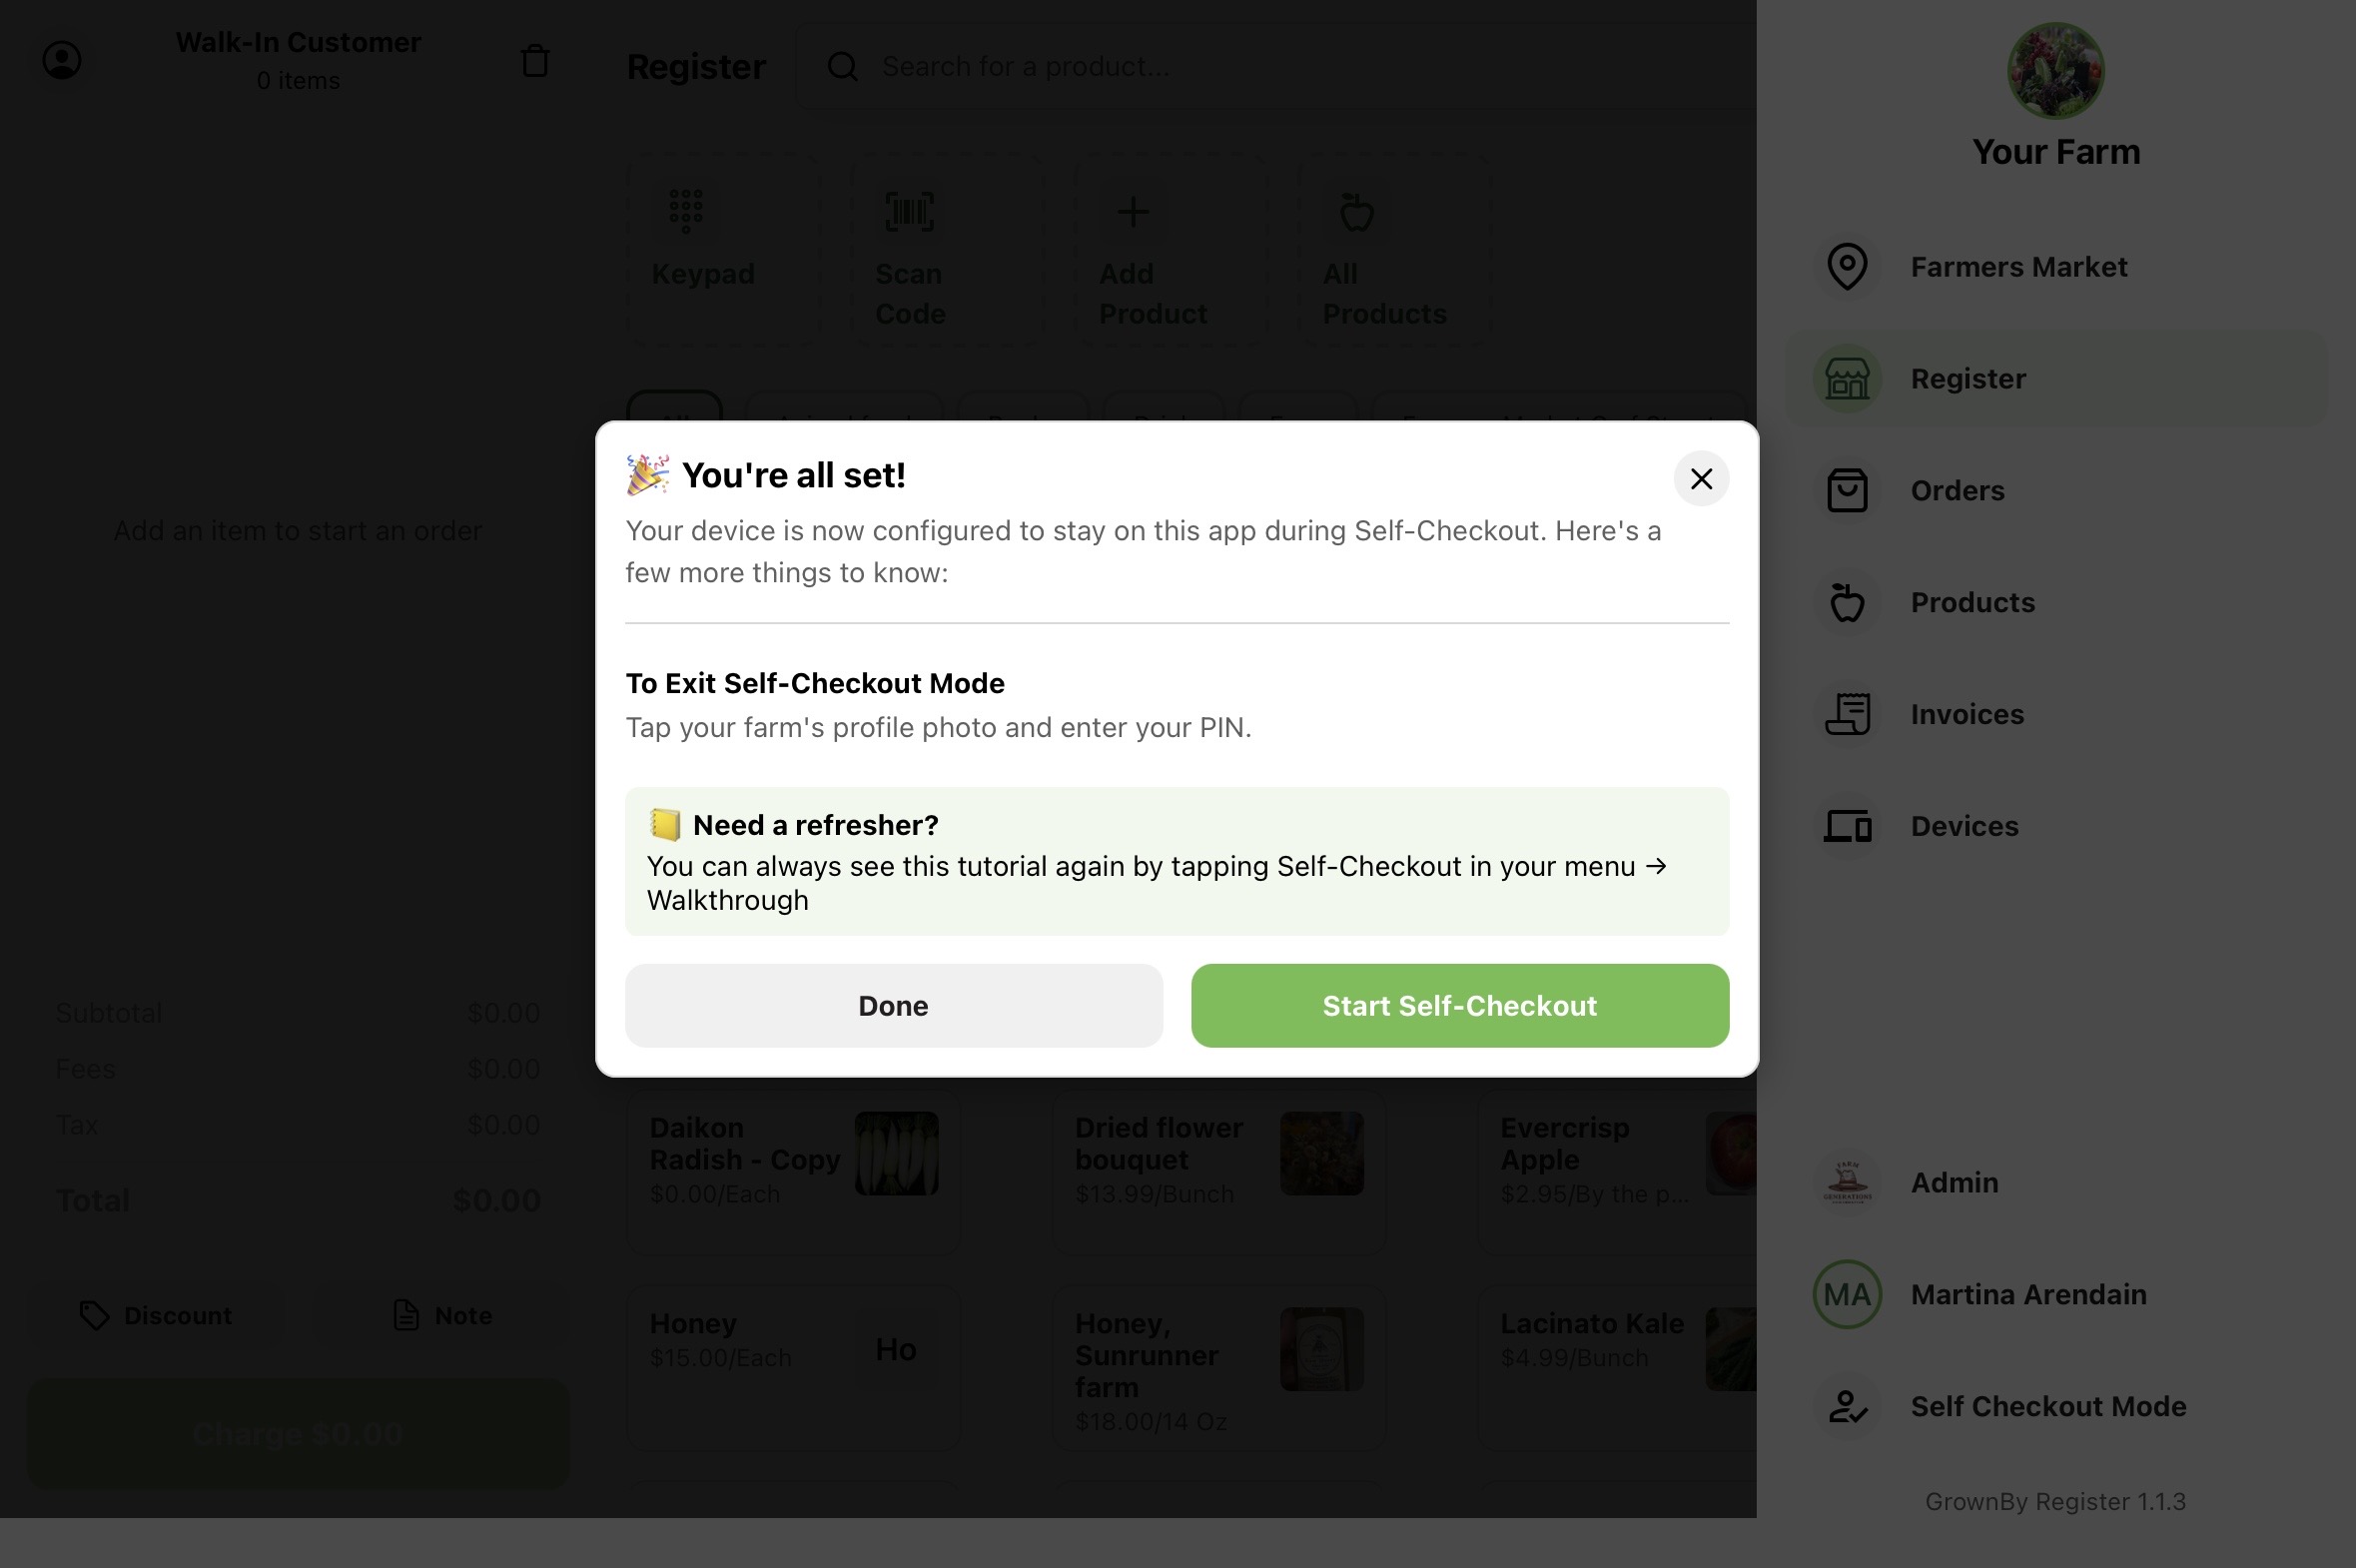
You're all set
When setup finishes, you'll see a confirmation screen. From here you can tap Start Self-Checkout to begin a session right away, or Done to return to the hub.
The Self-Checkout hub
Once setup is complete, tapping Self Checkout Mode in the menu opens the Self-Checkout hub, with these options:
- Enter Self-Checkout Mode — start a session and show the customer screensaver.
- Configure self-checkout preferences — set payment methods and the screensaver (see Configuring Self-Checkout preferences).
- Change PIN — update the PIN staff use to exit. Choose a new 4-digit PIN and confirm it.
- Walkthrough & Help — run the device-locking walkthrough again any time.
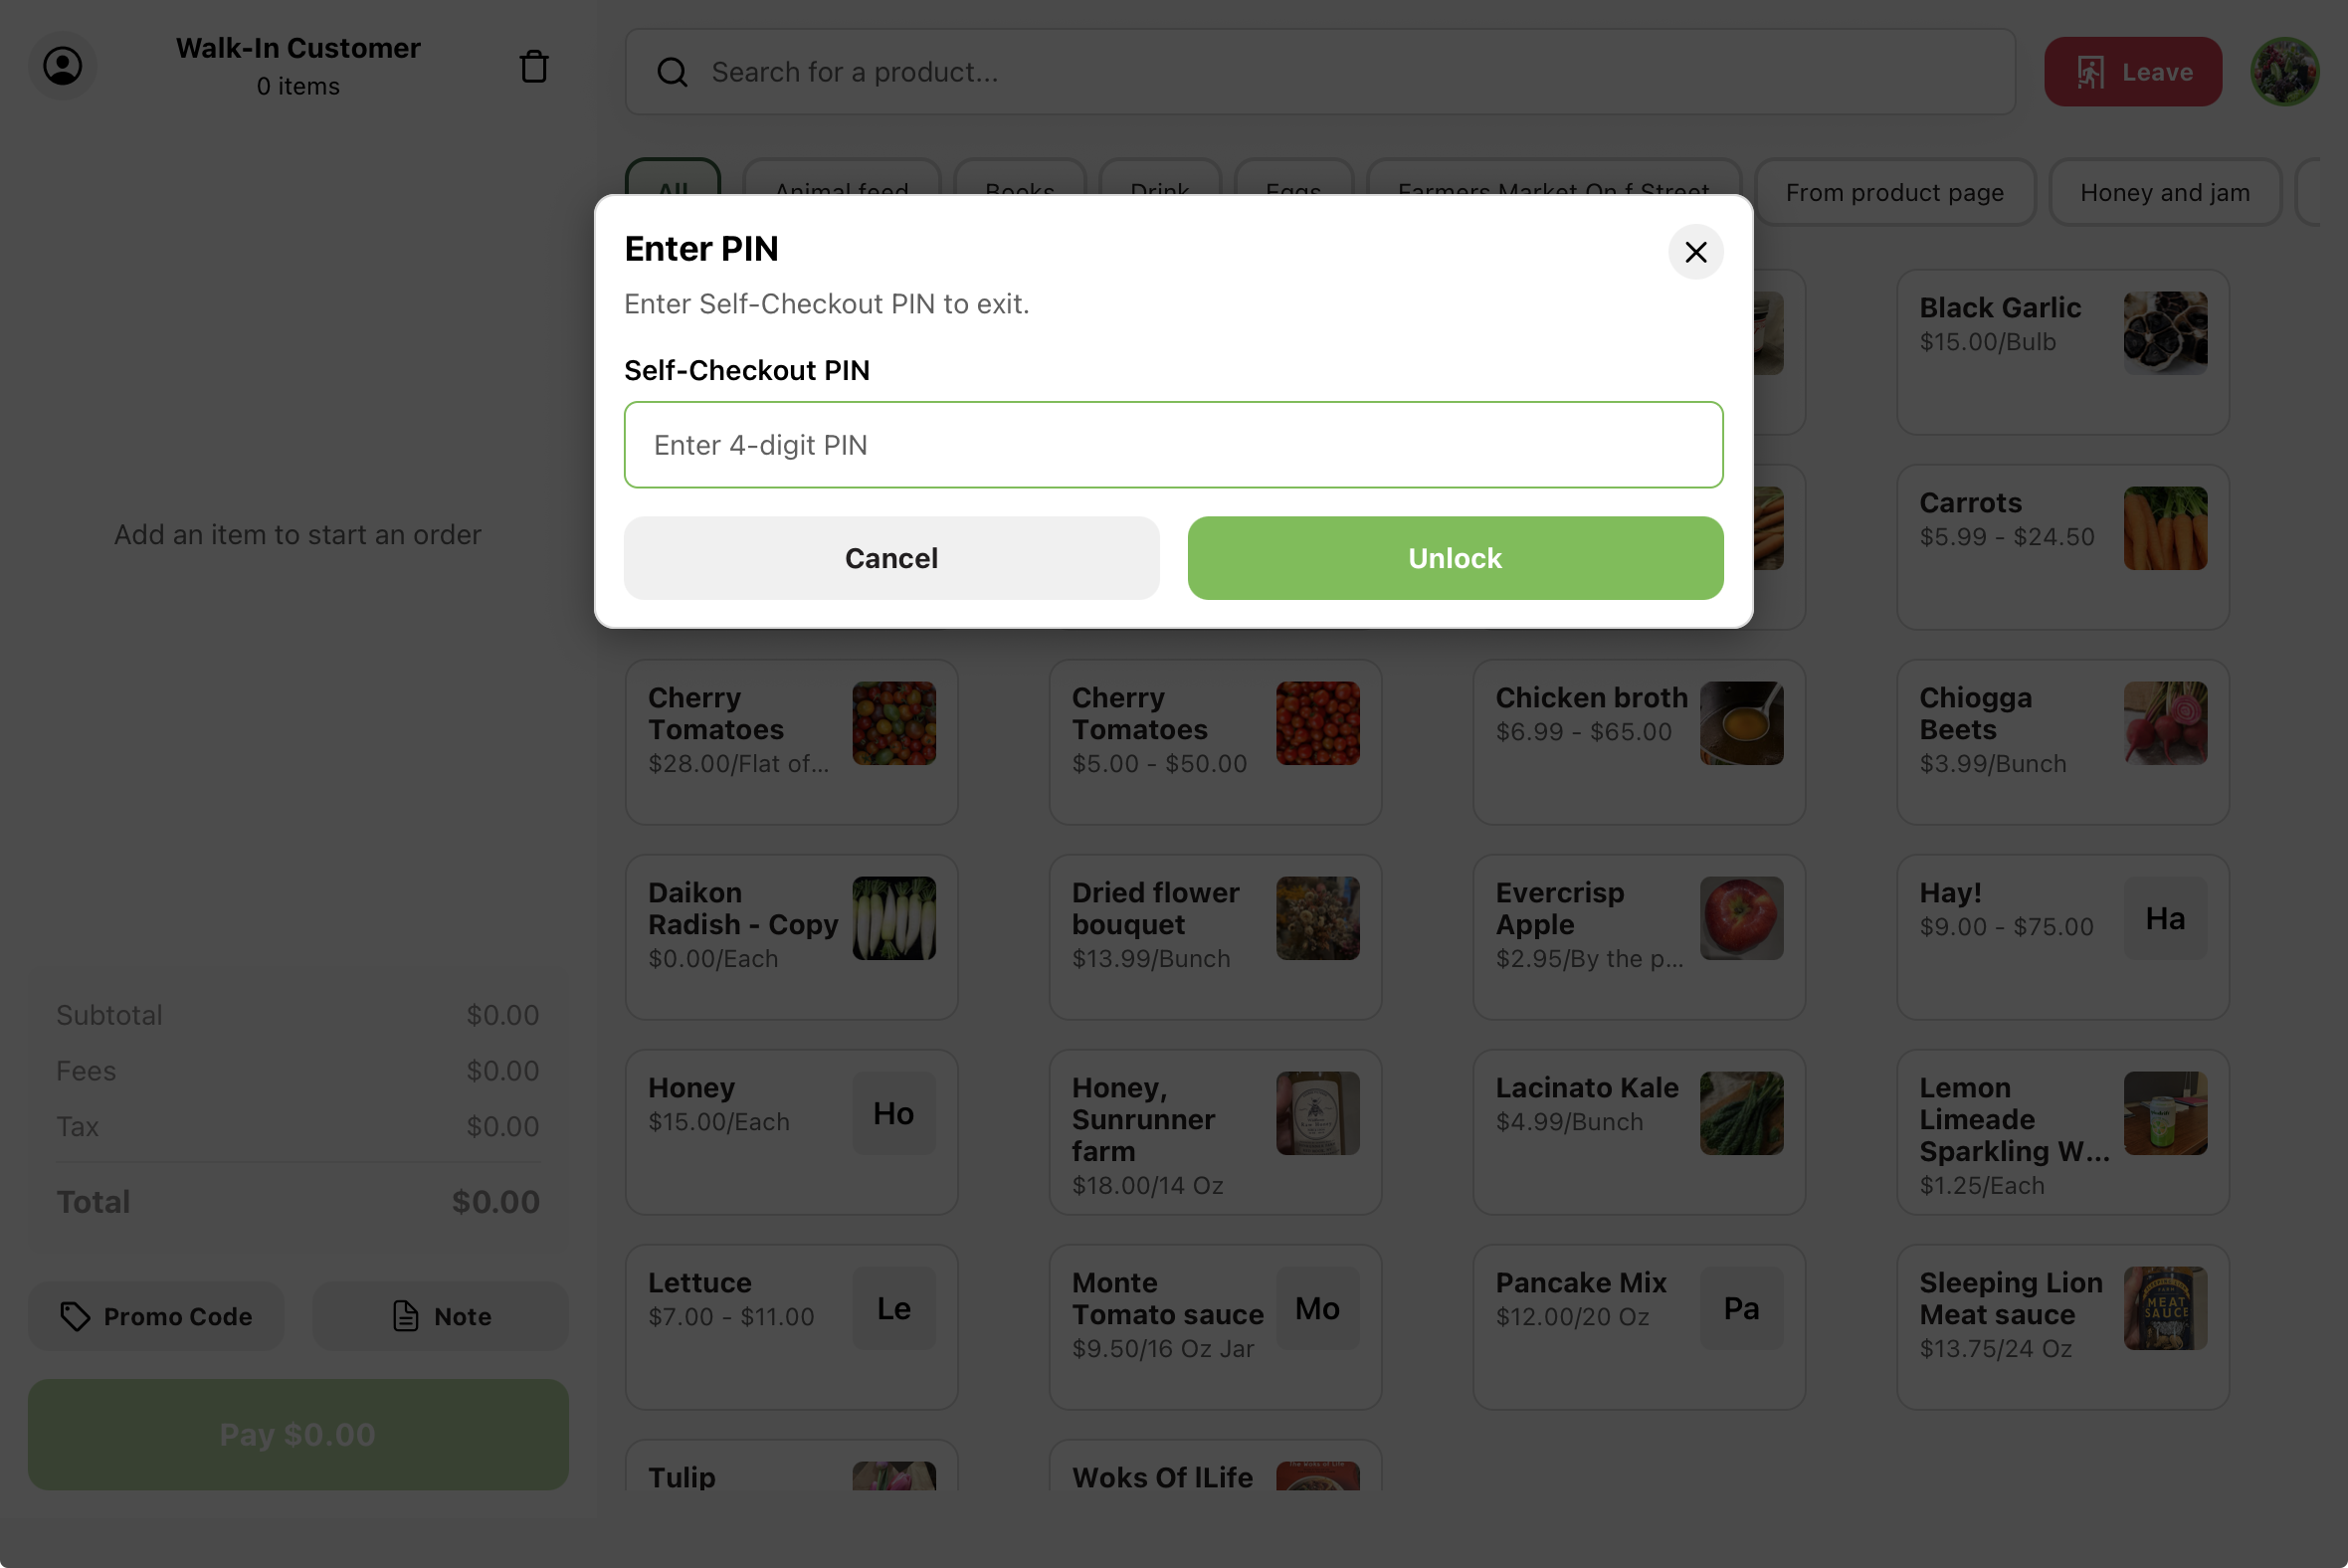
Exiting a session
To get back to the normal Register, tap your farm's profile photo and enter your Self-Checkout PIN, then tap Unlock. (You don't need the PIN to start a session — only to exit one.) To fully unlock the device afterward, end Guided Access (triple-click the side or Home button and authenticate) on iPhone/iPad, or unpin the app on Android.