How to Refund a customer order on Register
For step-by-step instructions with screenshots, see the walkthrough below.
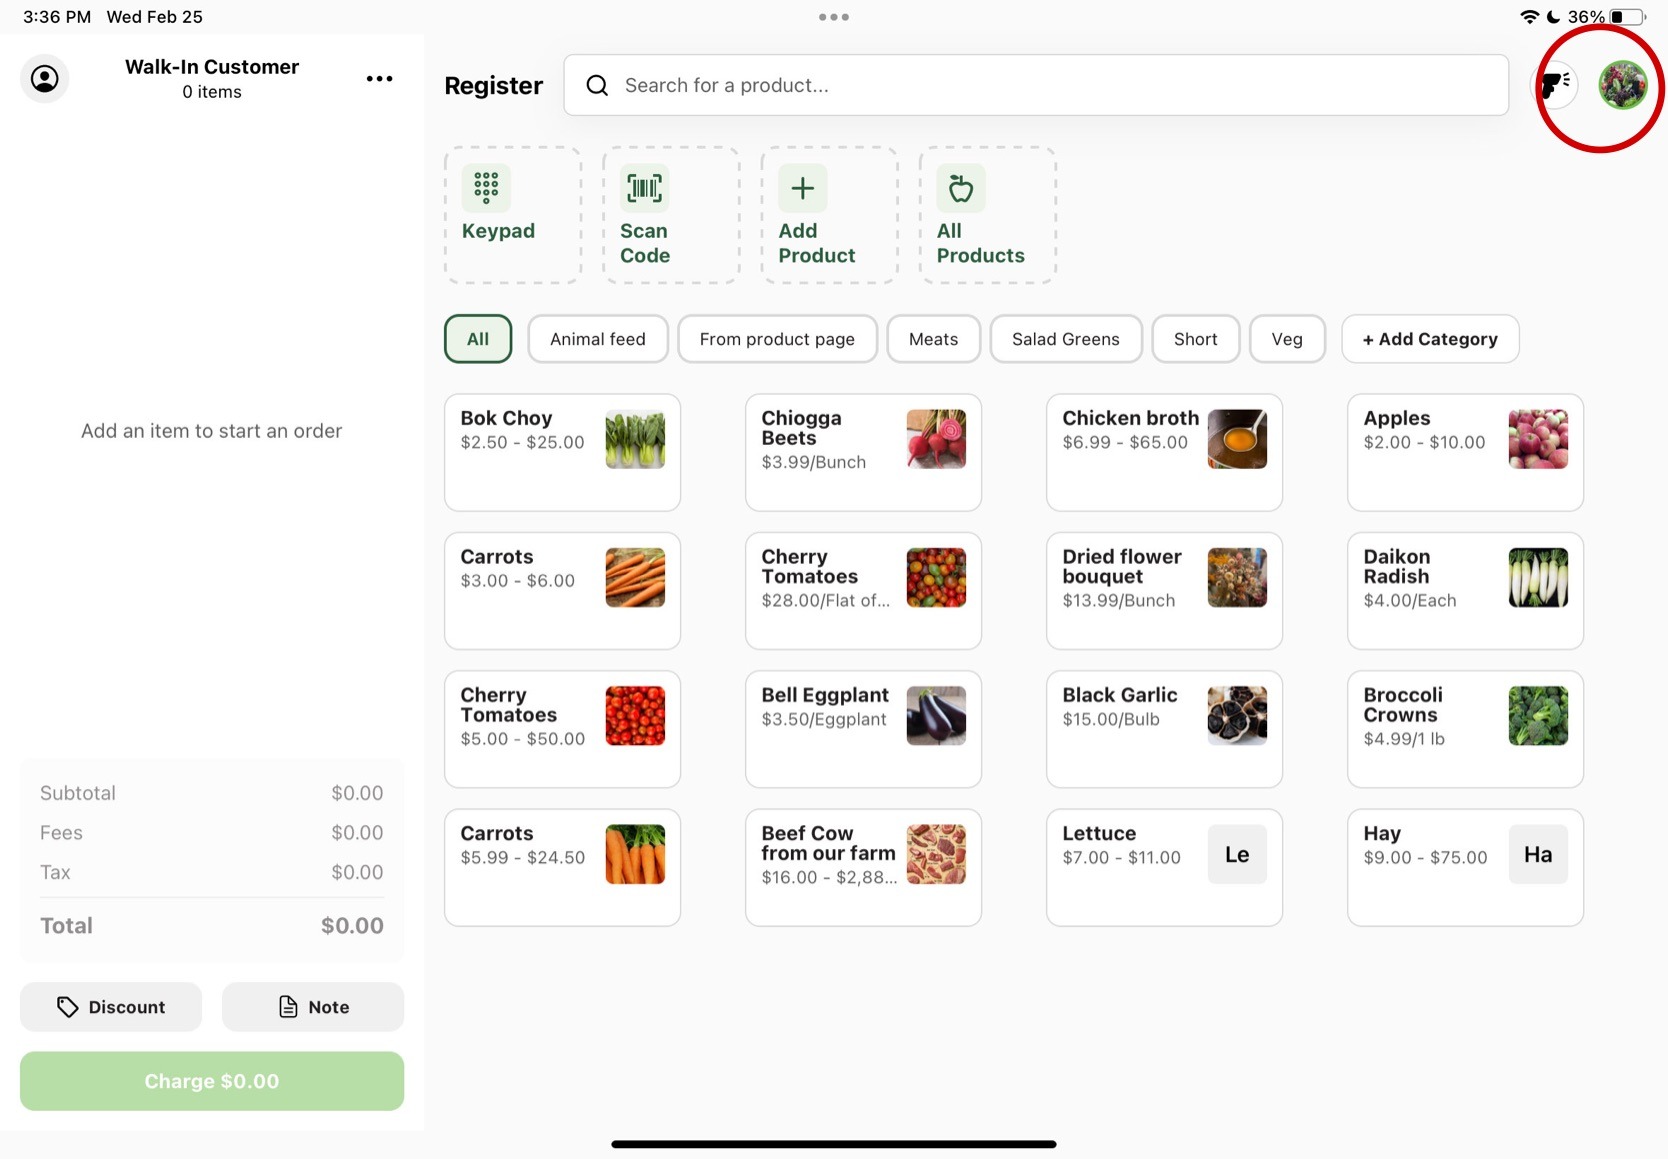
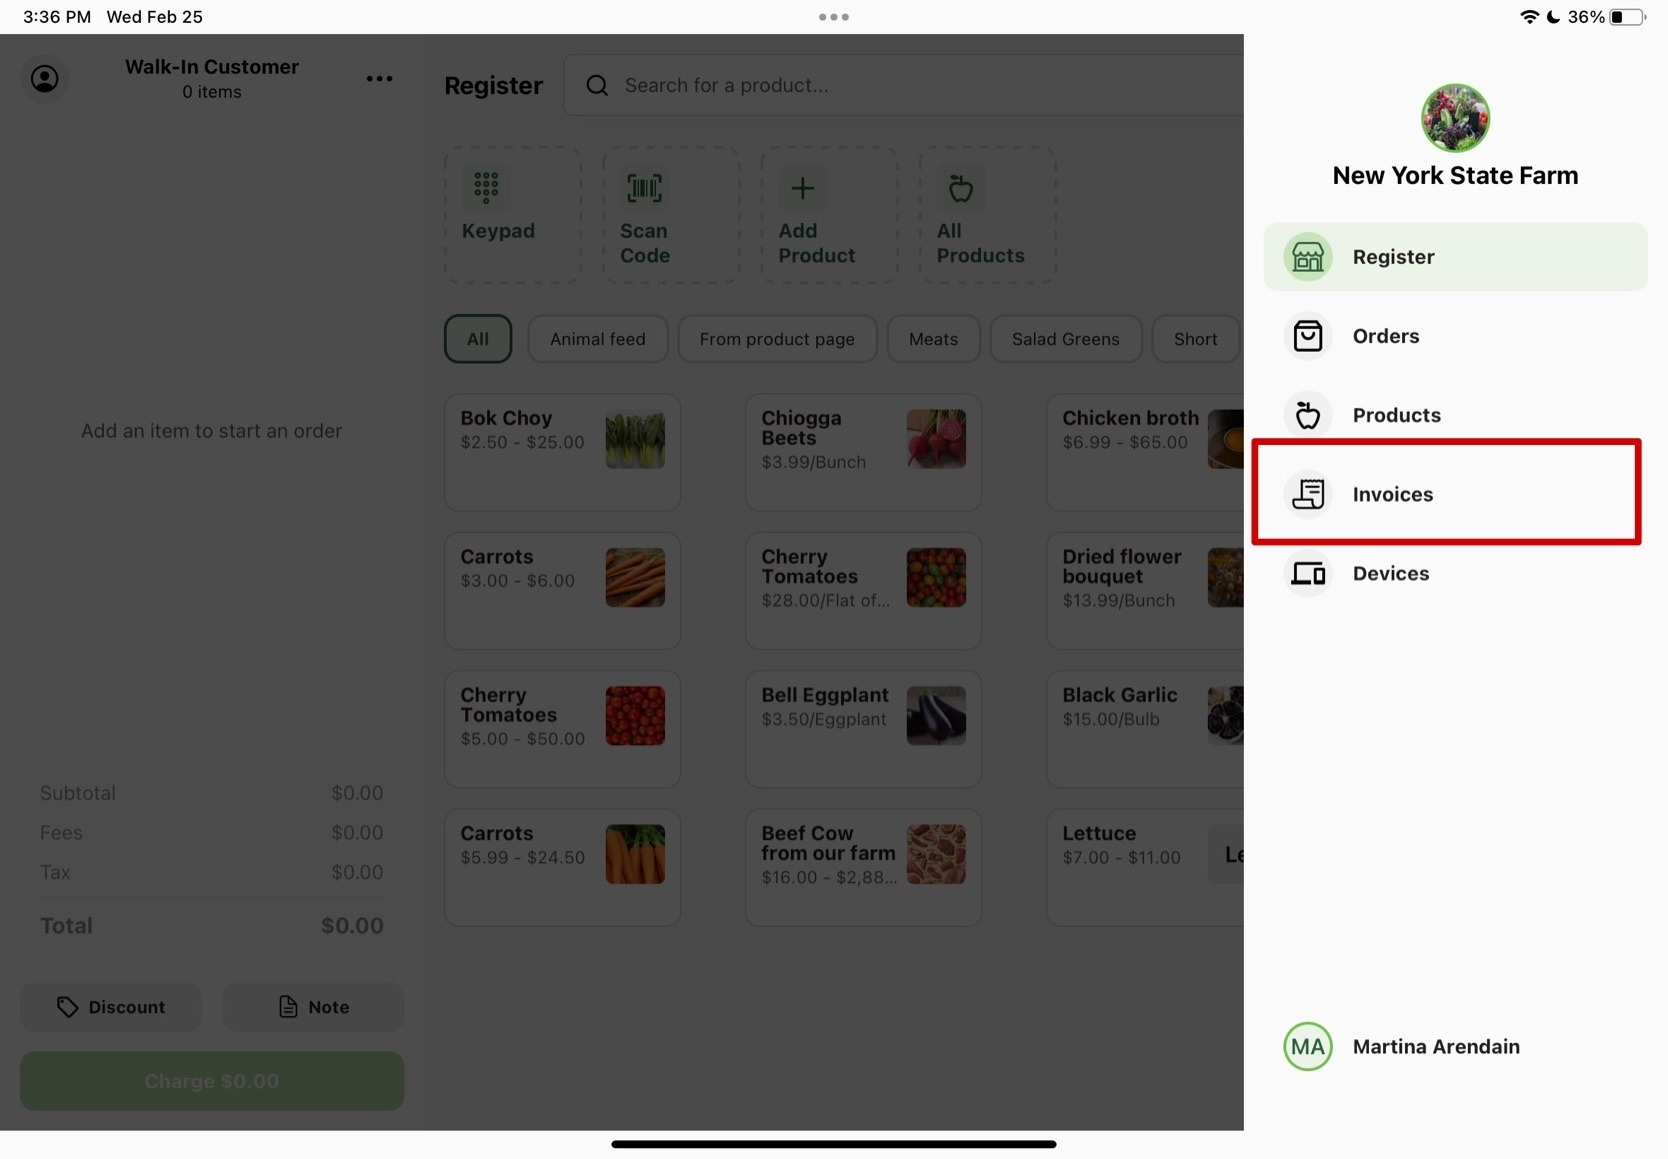
You can start to refund an order on Register by going to the Invoices page. Click on the profile logo in the top right corner of the starting page. Click on Invoices in the drop down menu, and find the order you want to refund. You can look it up by customer name or invoice number, or the invoices should be listed by most recent purchase.
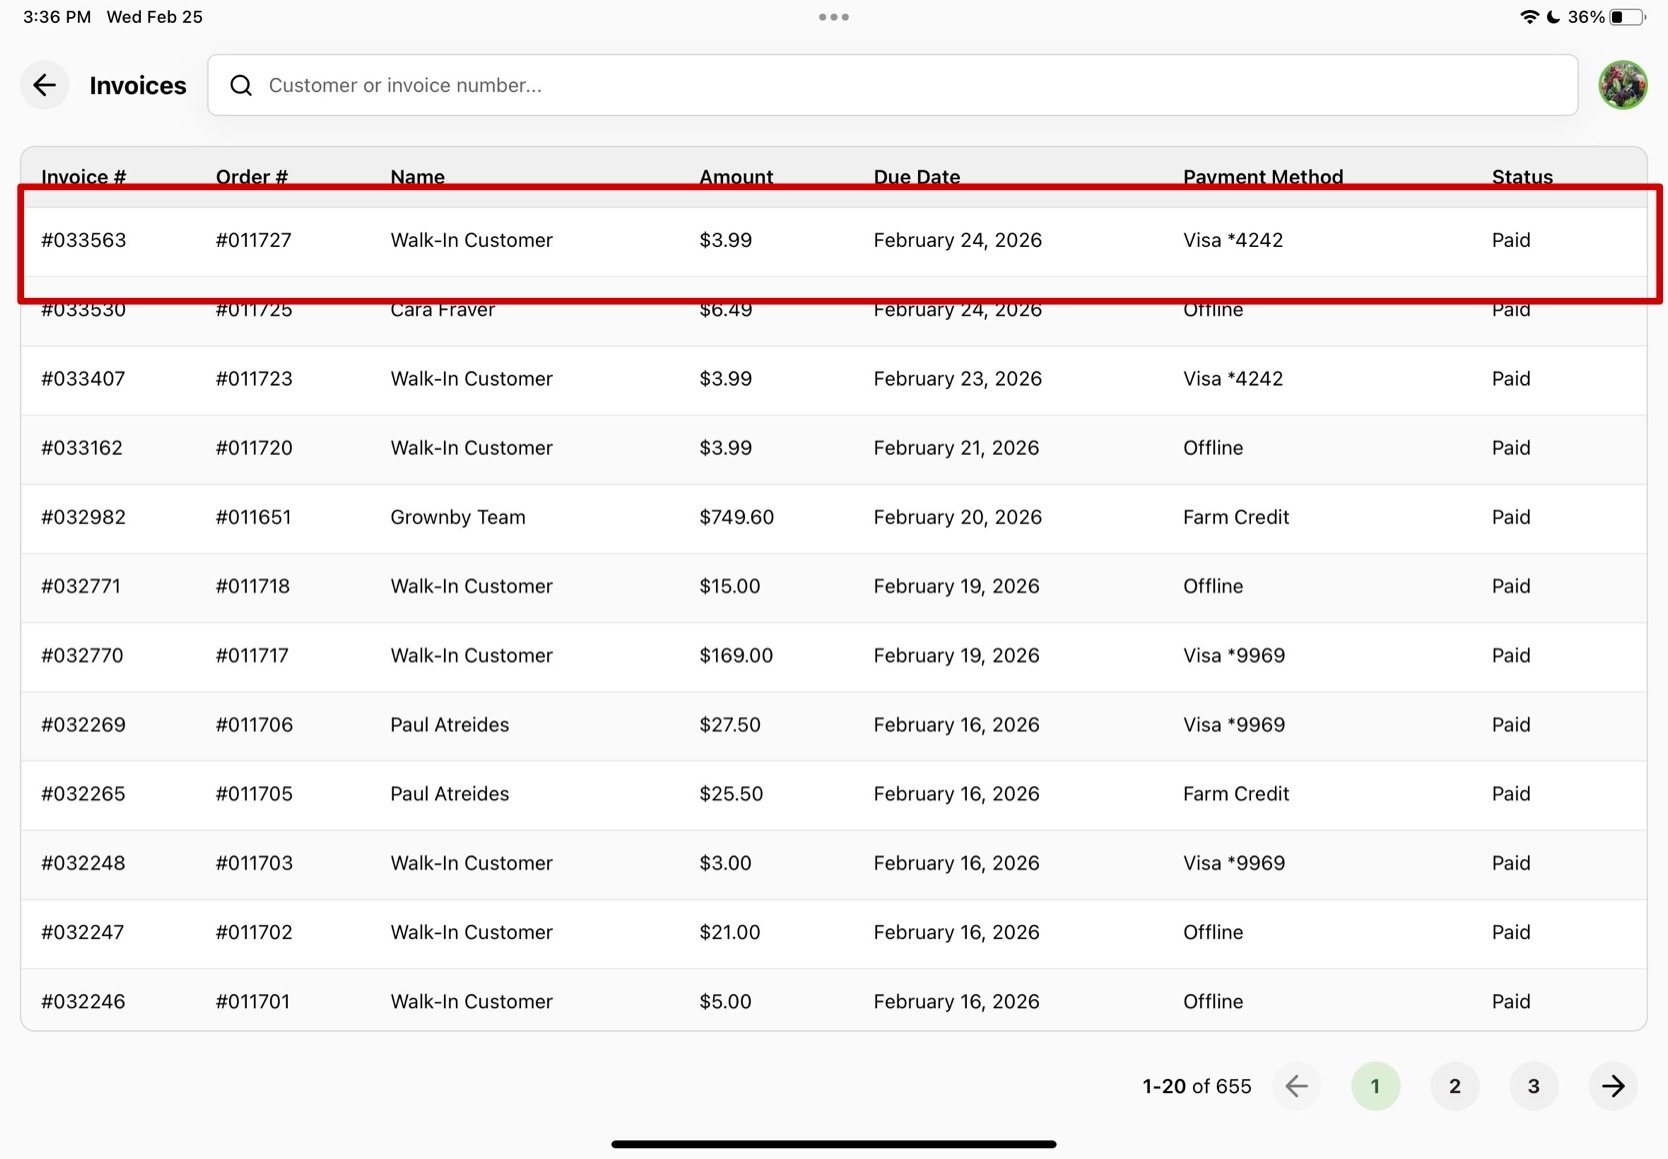
When you find the order, click on the order. A window called Invoice Actions appears. Press the button that says Refund. From there a browser pop up will appear and you may be asked to log back into GrownBy, but it typically will recognize your account and take you straight to the refund page.
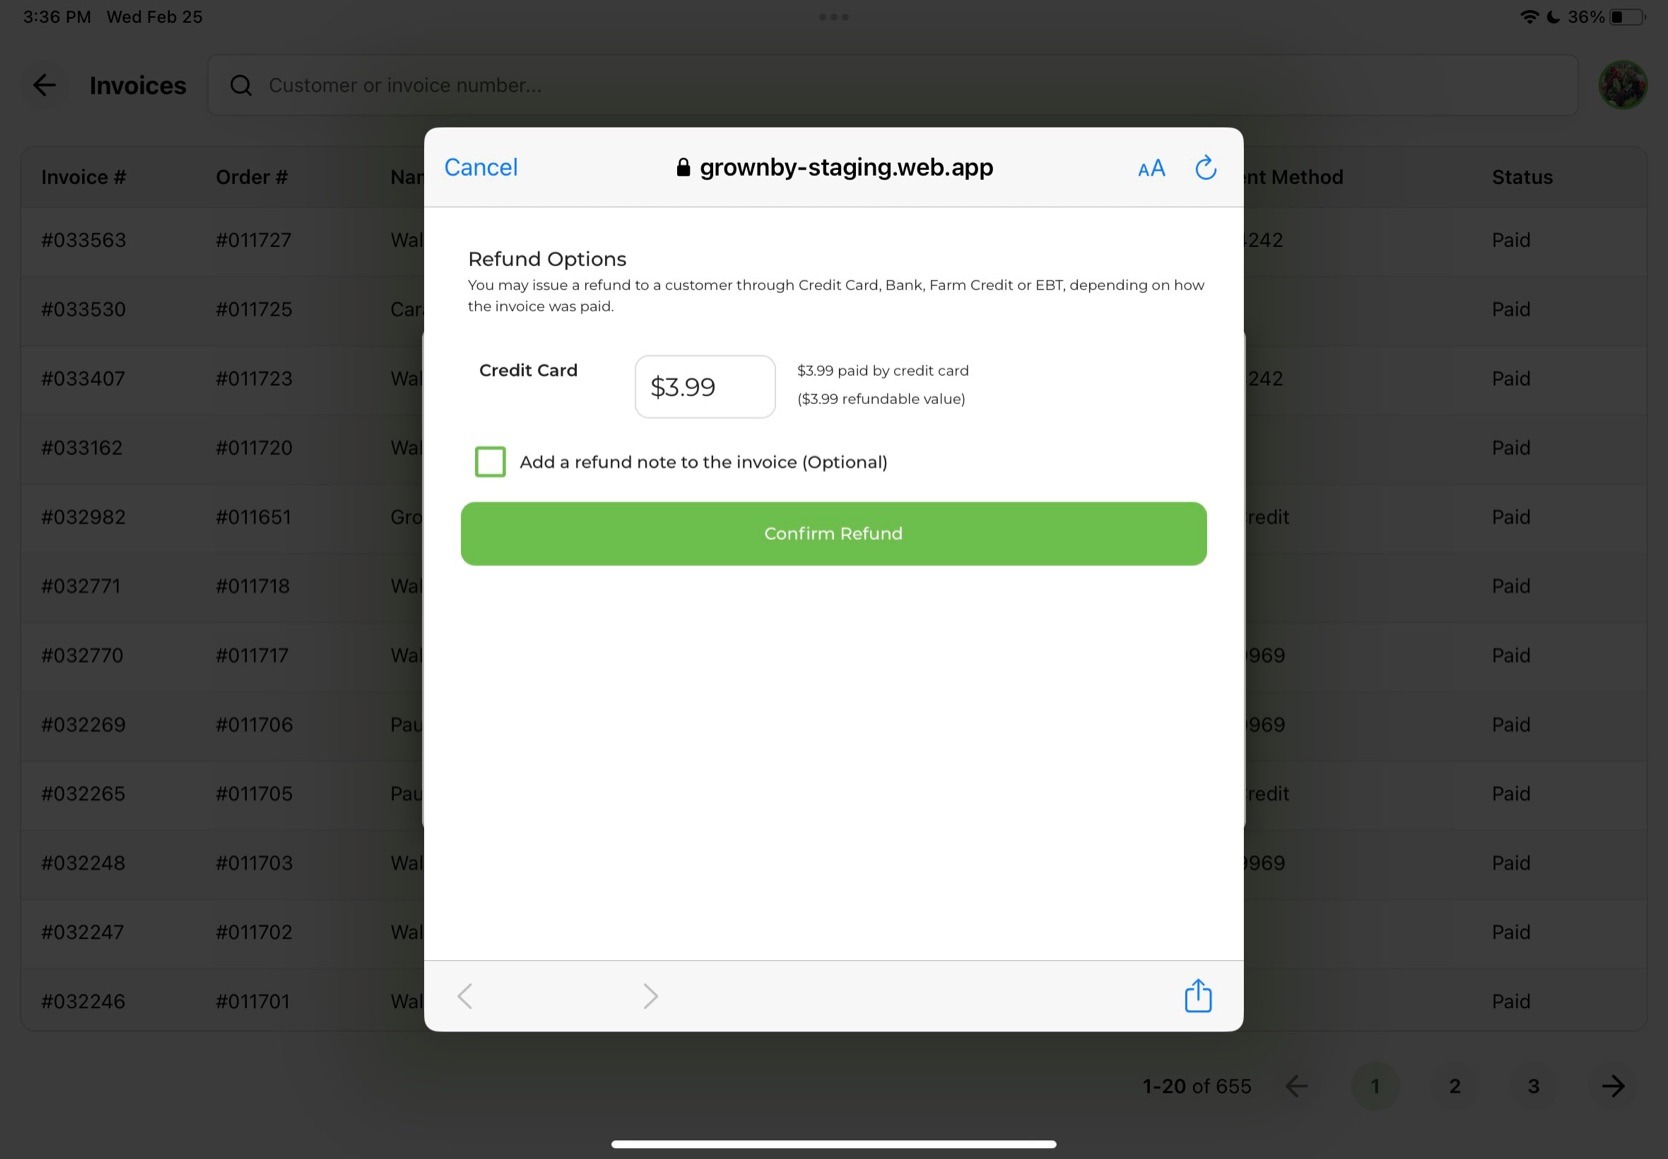
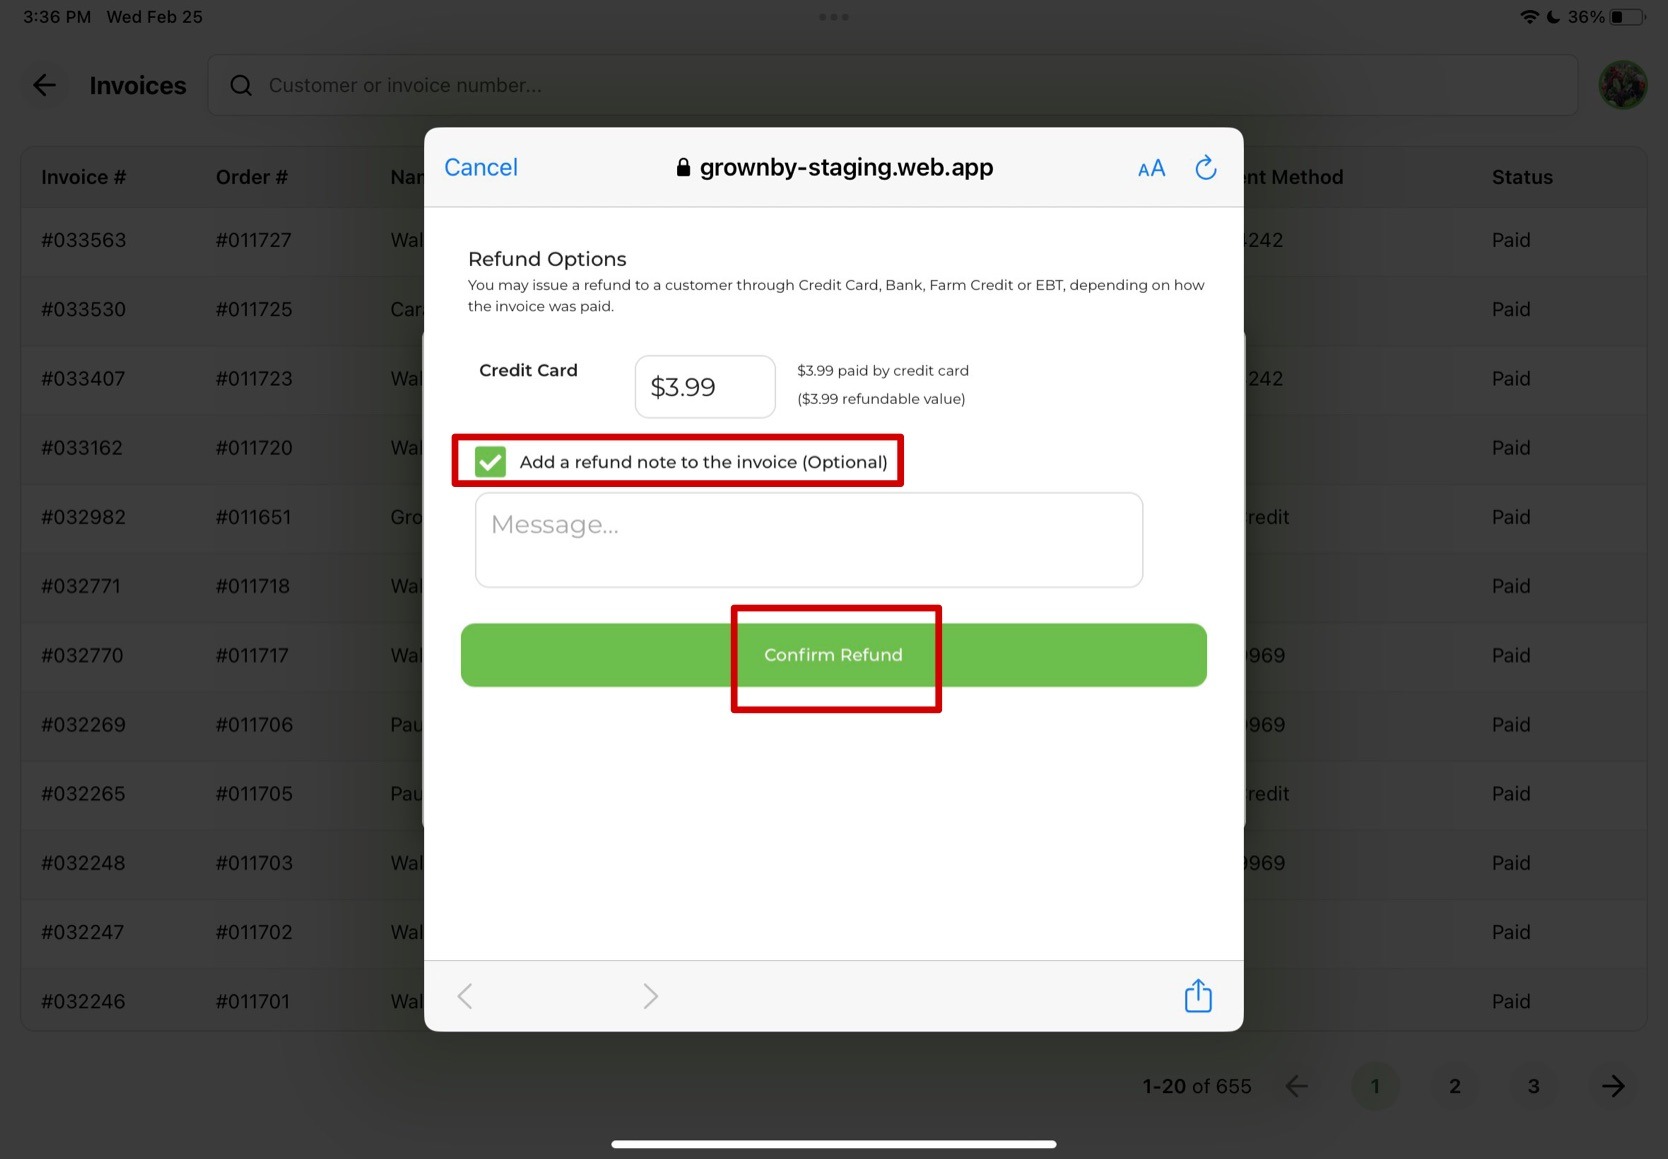
When the refund page appears, you will see a separate input row for each payment source used on the invoice (Credit Card, Bank (ACH), EBT, or Farm Credit), each showing the refundable amount. Adjust amounts as needed. There is also an option to enter a refund note to the invoice for convenience.
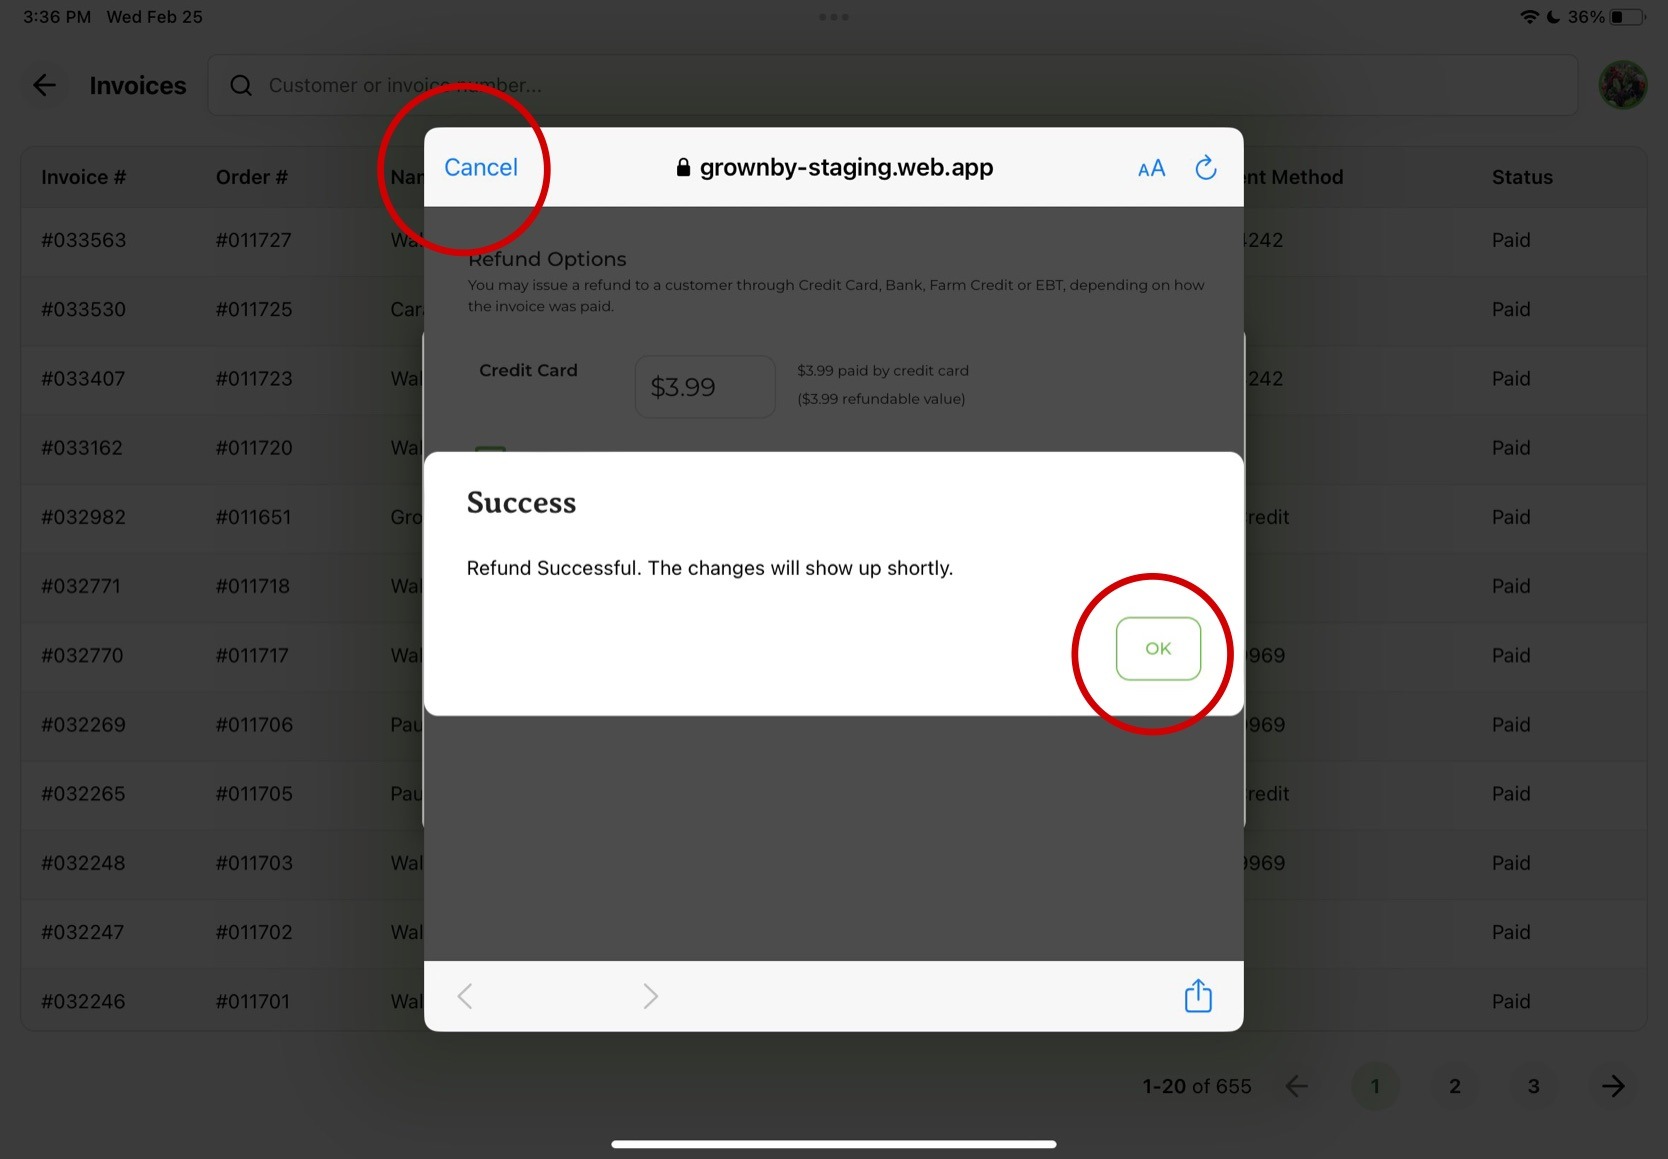
After entering this information, click on Confirm Refund and you should see a pop up window that says Success!. Exit out of the screen by pressing Cancel in the top left corner of the pop up window.
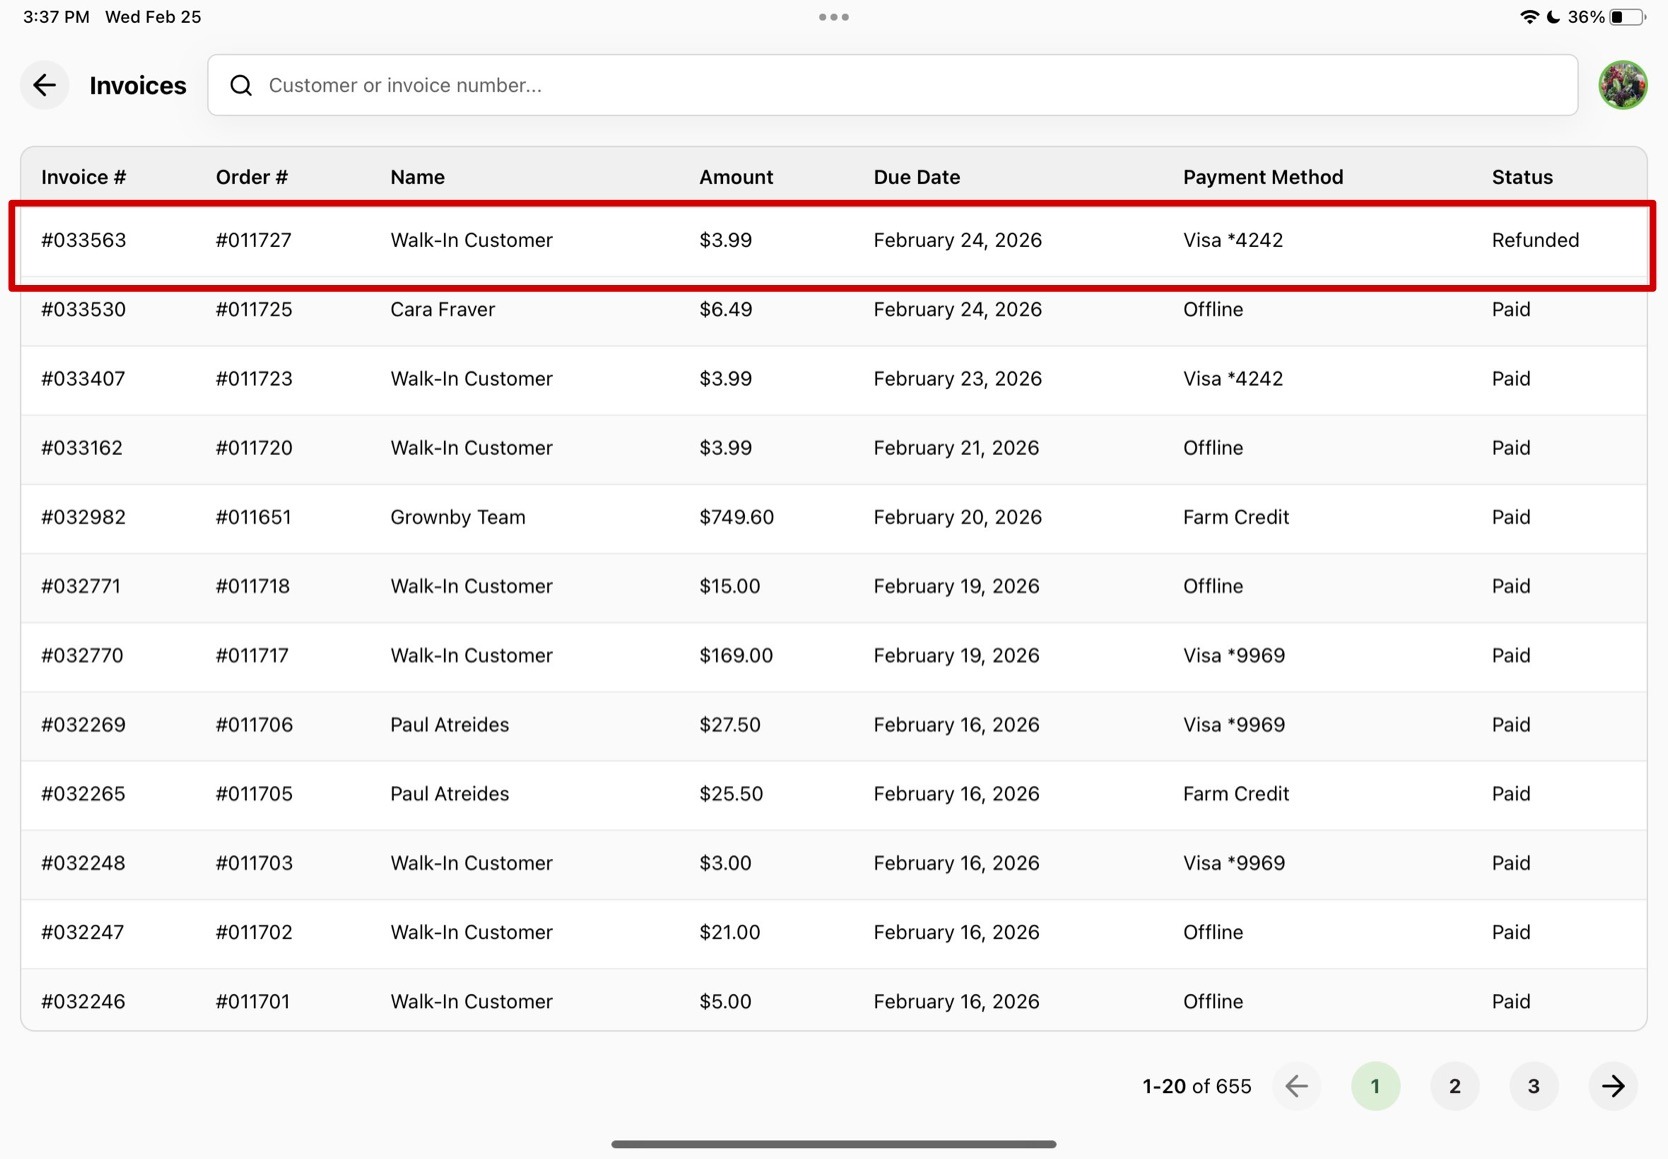
To confirm, the Invoices page should update and reflect that order as Refunded under the Status column.
Walk through instructions on refunding an order
1. Navigate to the Invoices page
Click on the profile logo in the top right corner of the starting page.
2. Click on "Invoices" in the drop down menu.
3. Select the order you'd like to refund.
Find the order you want to refund. You can look it up by customer name or invoice number, or the invoices should be listed by most recent purchase. When you find the order, click on the order.
4. Press "Refund".
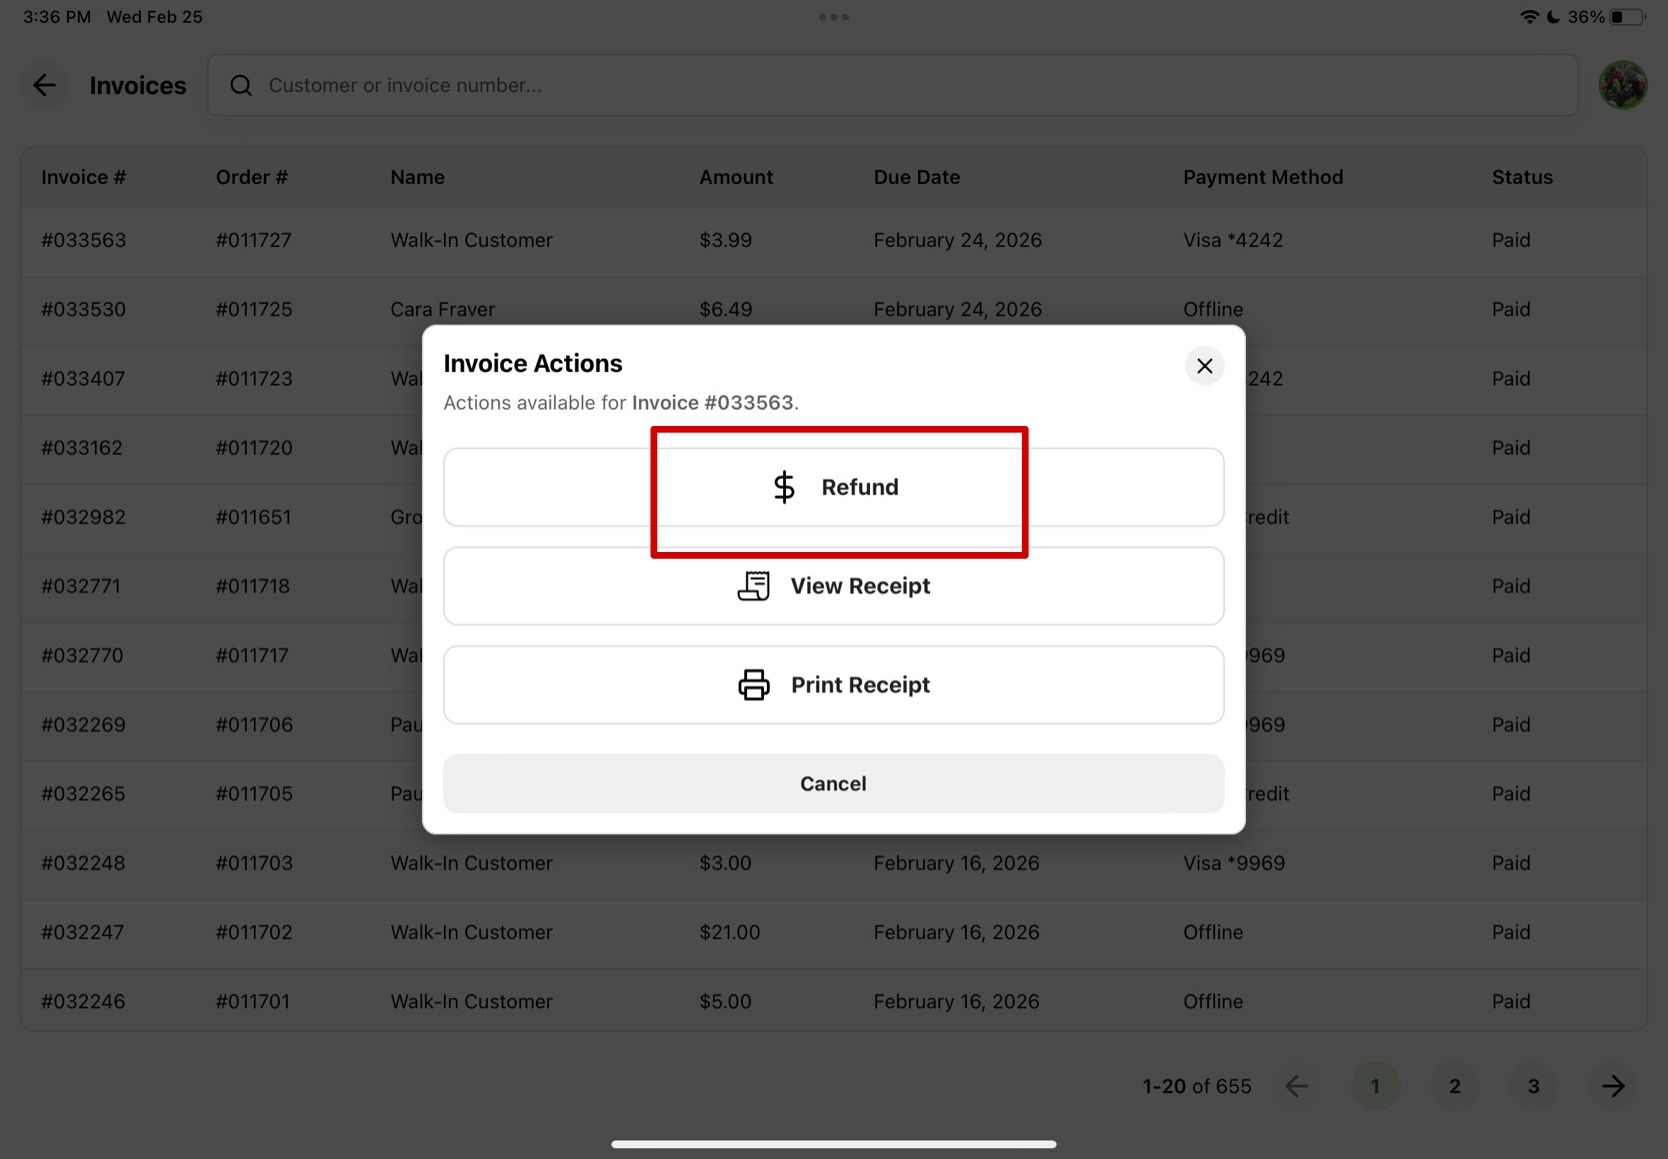
Note: The Refund option appears only for invoices with a Paid or Refunded status.
5. Enter the total amount you'd like to refund per payment source.
You can enter any amount equal or less than the total amount into the text box for each payment source shown.
6. Add a note to your refund on the invoice (optional).
You can add a refund note to the invoice by checking the "Add a refund note to the invoice (Optional)" checkbox, which reveals a message field. Add your message for convenience and then press Confirm Refund. This is optional.
7. Refund success confirmation.
An alert titled "Success" will appear with the message "Refund Successful. The changes will show up shortly." Press OK and then Cancel in the top left of the pop up window to exit out.
8. Confirm refund with a status change.
The status will update to Refunded when fully refunded. Partial refunds across payment sources are supported, and a partially refunded invoice may still show as Paid until fully refunded. For more information on partial refunds, see Partial Refunds.