Fulfillment page
Here's a video that shows how to use the fulfillment page to your business's advantage:
The fulfillment menu gives you all of the information you need to get your products to the customers who ordered them. This article explains what is available on the fulfillment menu with information about the: Pick List, Location Summary, Sign-In Sheets, Packing Sheets and what each of these parts of the dashboard can do for you.
We have also created a Standard Operating Procedure (SOP) document called What to do on Distribution Day, which can be a helpful tool to make sure you don't forget any steps along the way. That article includes a link to a printable version of the SOP. You may want to hang it up somewhere in your farm office to serve as a reference!
To get started first, access the fulfillment page through your dashboard. It looks like this:
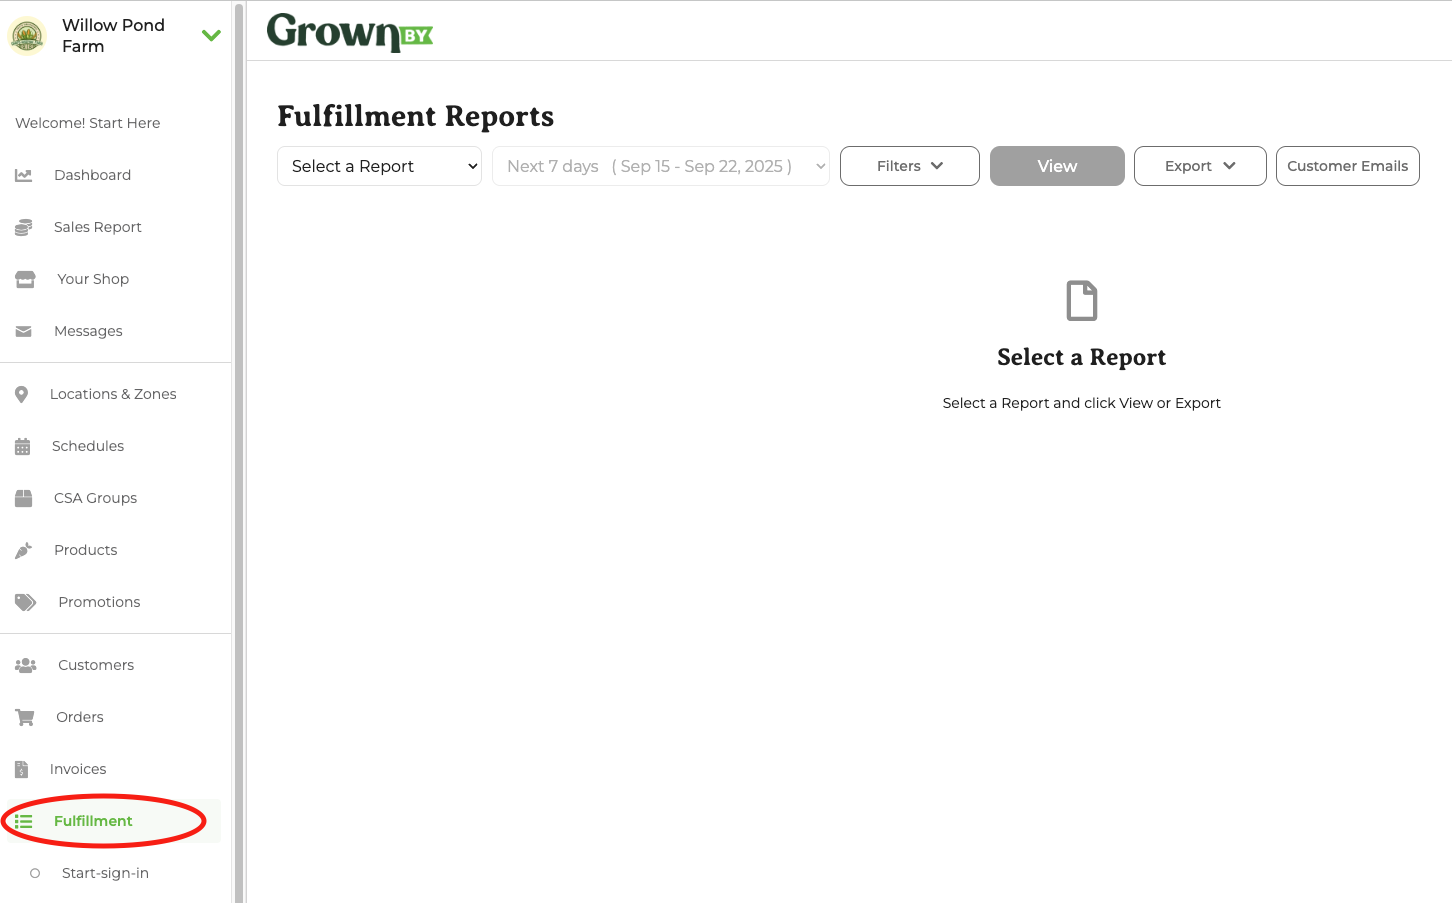
There are four sections of this page which you access by clicking on the Select a Report drop down: Pick List, Location Summary, Sign-in Sheets, and Packing Sheets. We explain each section below.
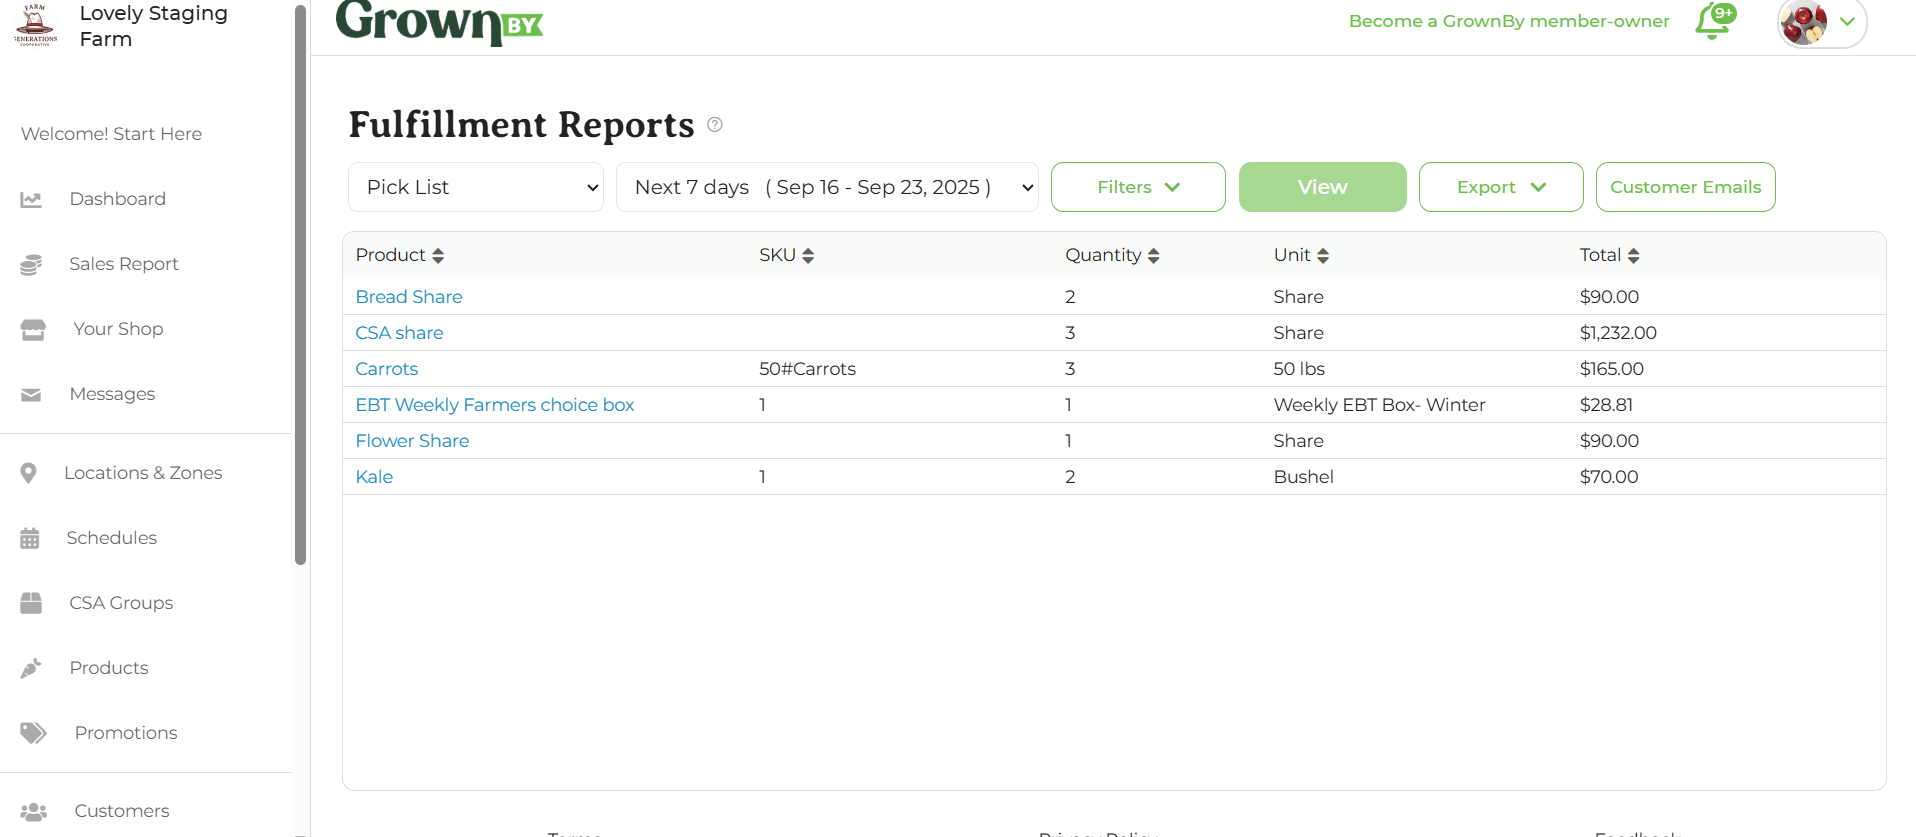
Pick List
You can use the pick list to get a snapshot of what has been ordered from your farm. For many farms, this serves as a harvest list that you can pass on to your crew or bring to the field. It is an aggregate report of all the products that you are selling within the search parameters (set by the filters as described below). It can also be helpful for farms that communicate with other growers/producers about additional items needed. For example, if you want to get a quick view of how many jars of honey you need to ask the beekeeper for this week, the Pick List is an easy way to view this information.
The page looks like this:
There are a few filters on the page to help you narrow down the information you are looking for. You can filter by:
- Date
- Catalog
- Product Type
- Location
- Product
- Producer
- Category (matches a product's reporting or online category)
Hidden and Register-only products are excluded from Fulfillment results.
Once you have set your filters, you can choose to either View the report on the screen, open the Export dropdown to export as PDF (Export as PDF) or CSV (Export as CSV), or pull the emails of customers who are relevant to your filters via the Customer Emails button.
If printing a pick or harvest list, the PDF export is your best bet.
If you would like to further manipulate this report to customize it, a CSV export is your best option.
Location Summary
The location summary answers "where am I delivering what?" or "how to pack the truck". It is an aggregate report of all the products that you are harvesting and where they go within the search parameters (set by the filters described below). The on-screen version looks like this:
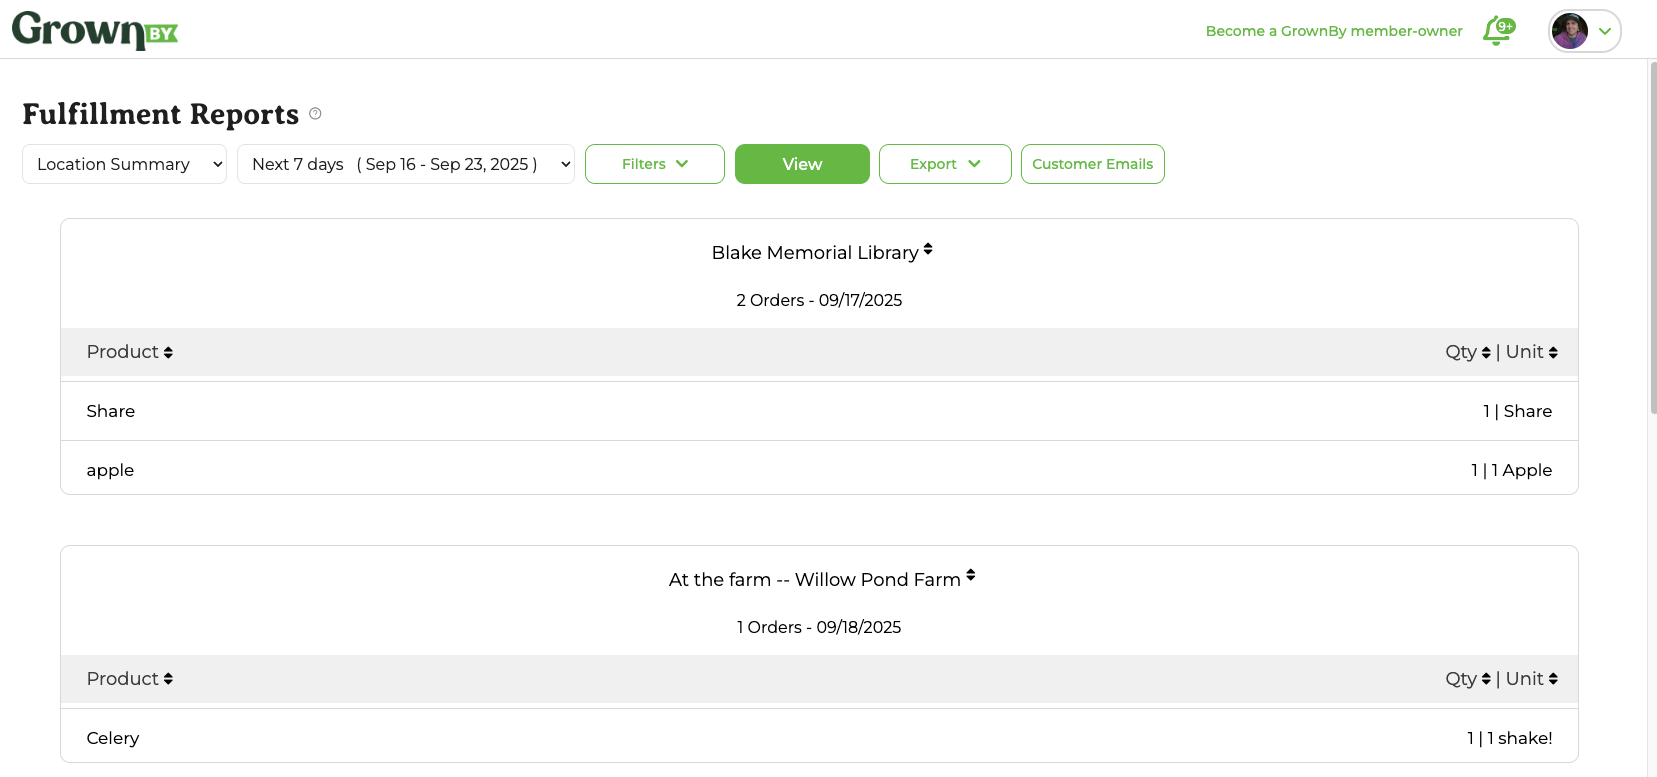
The filters work exactly the same as the Pick List but the output displayed is different. The location summary groups products ordered by location, gives you a number of orders for a given date, and further lists the specific products and quantities ordered.
Again, you can open the Export dropdown and choose Export as PDF or Export as CSV if needed.
Sign-in Sheets
Sign-in sheets answer "who needs to pick-up/be delivered what?" On the browser, the report looks like this:
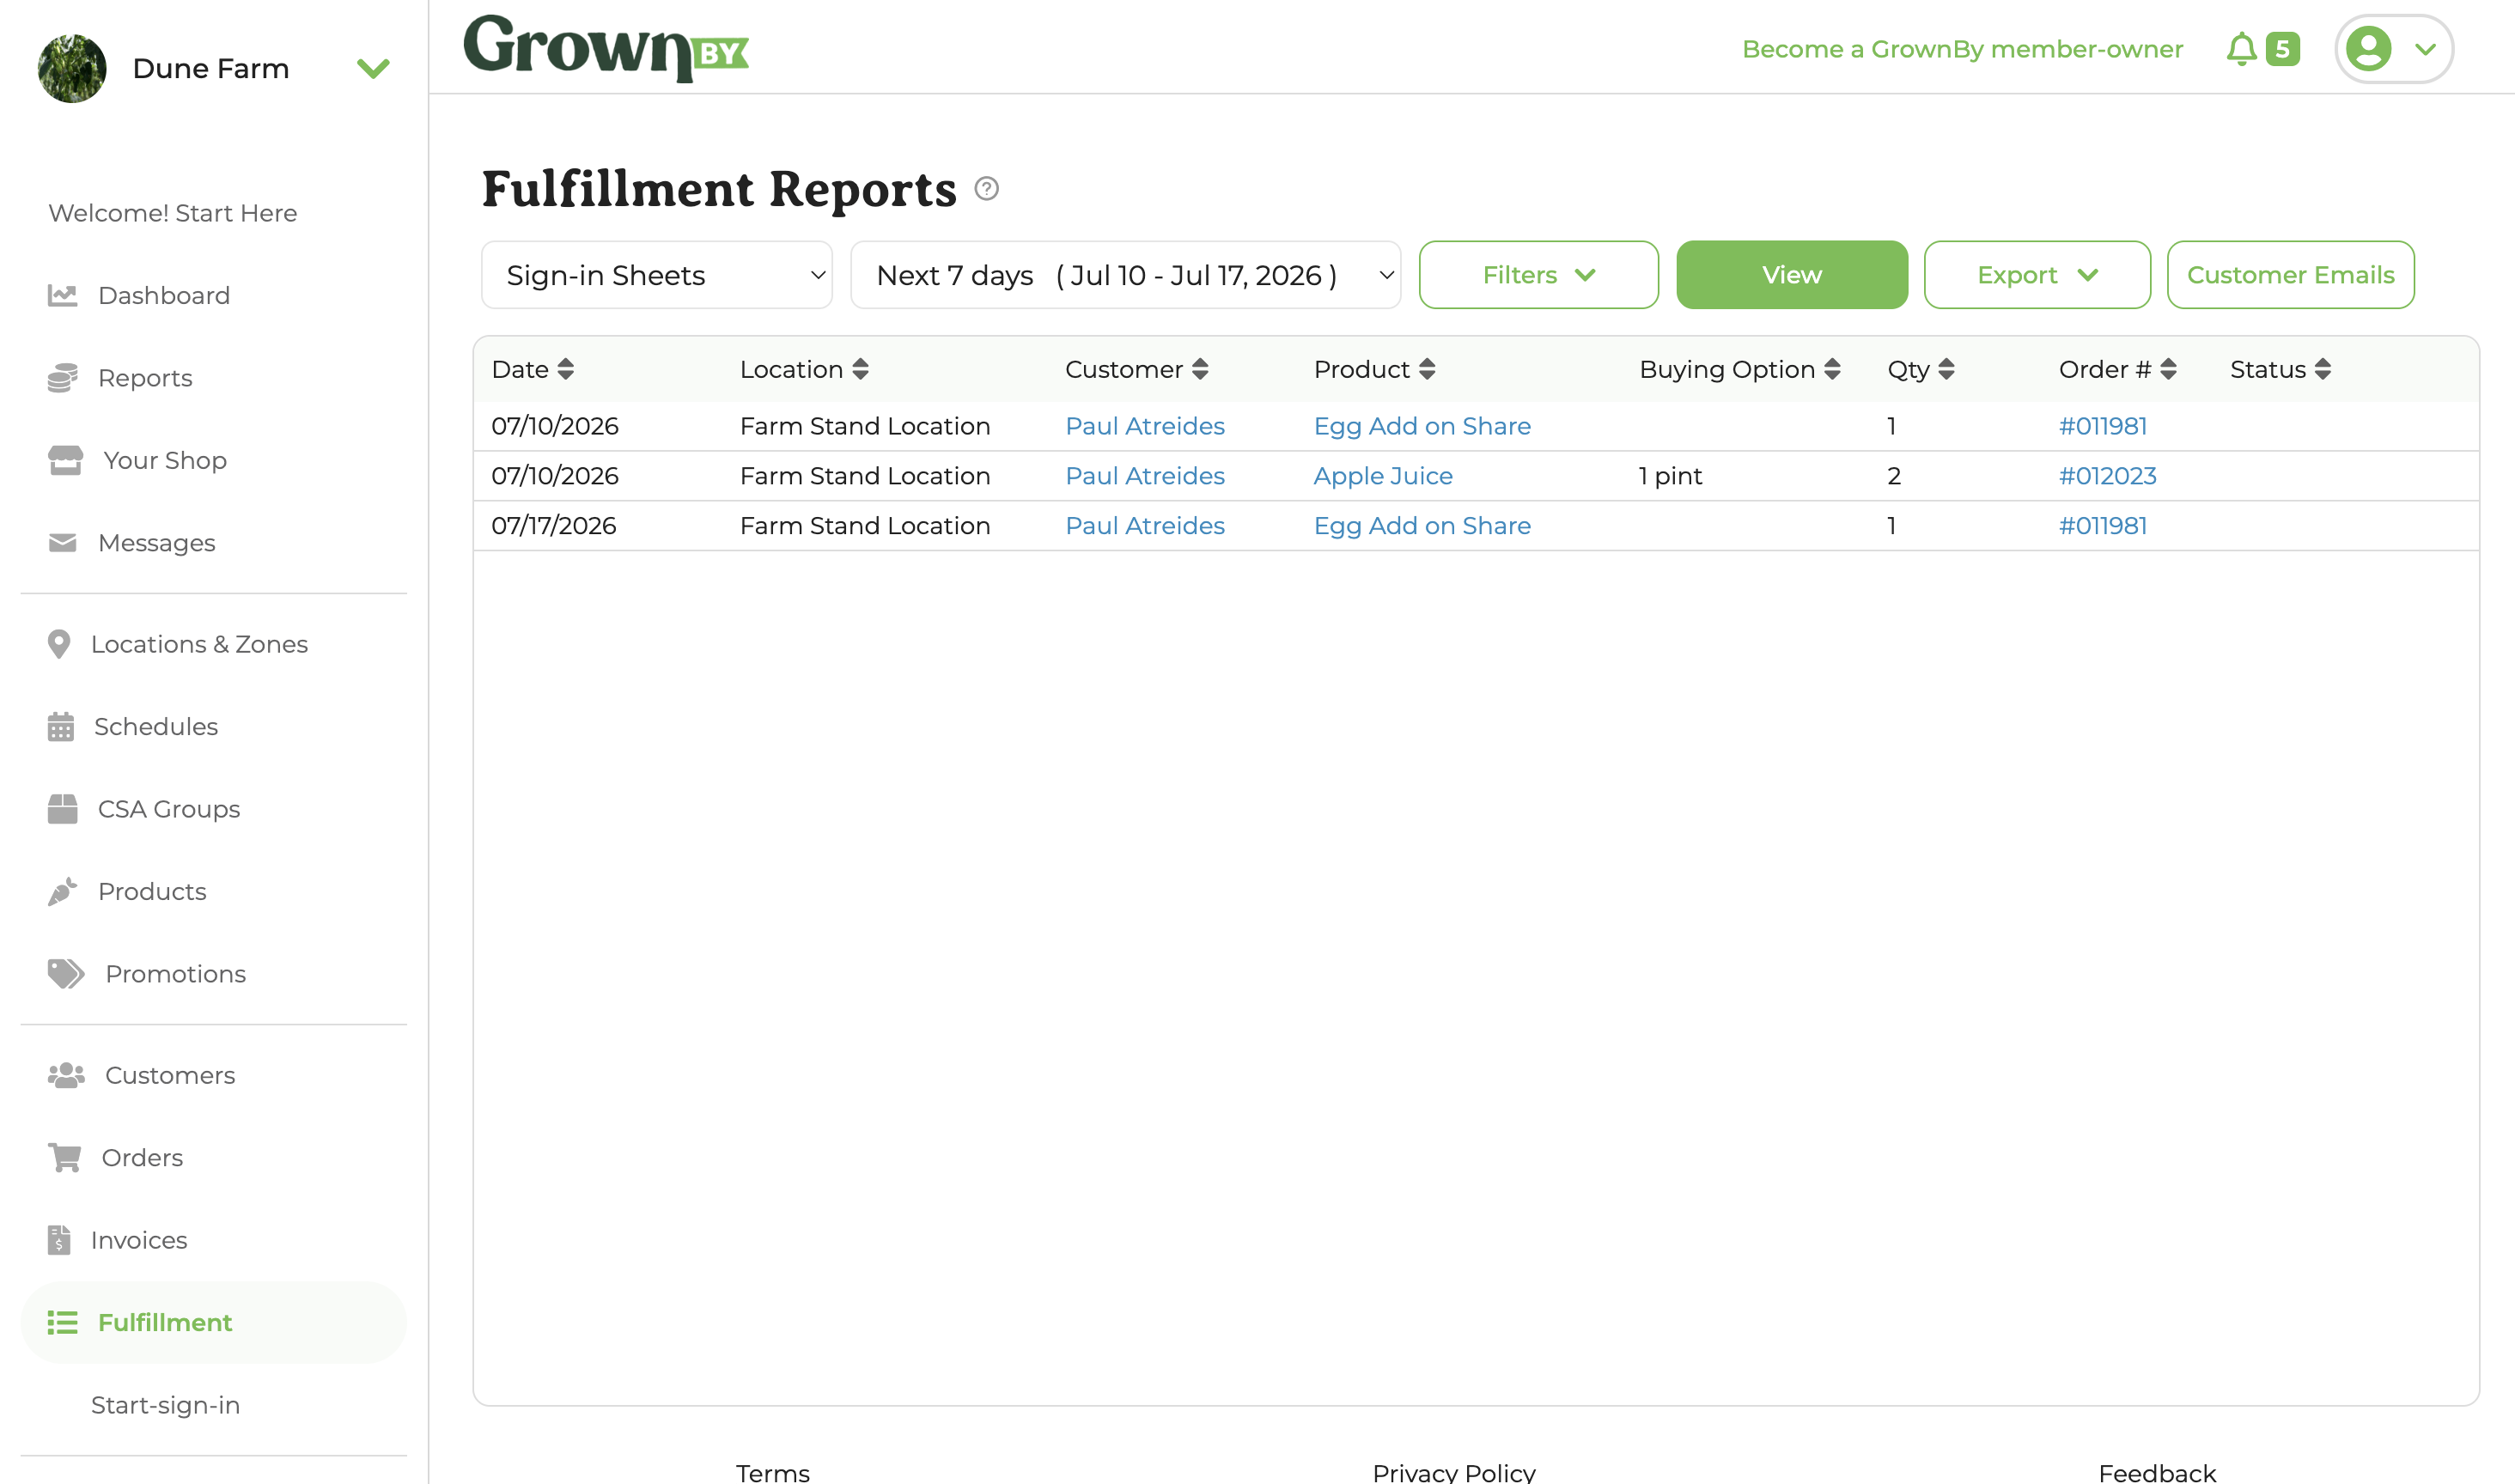
The same filters are available as the Pick List, but you can also filter by Status here.
The PDF has a summary cover page which lists orders per distribution location and then the full list of customers for that location and what they need to pick-up. This export is best for the traditional CSA model. You can pull a CSV of this information, too, which has more detail. We also recommend using the app based sign in option, which you can access from your main dashboard.
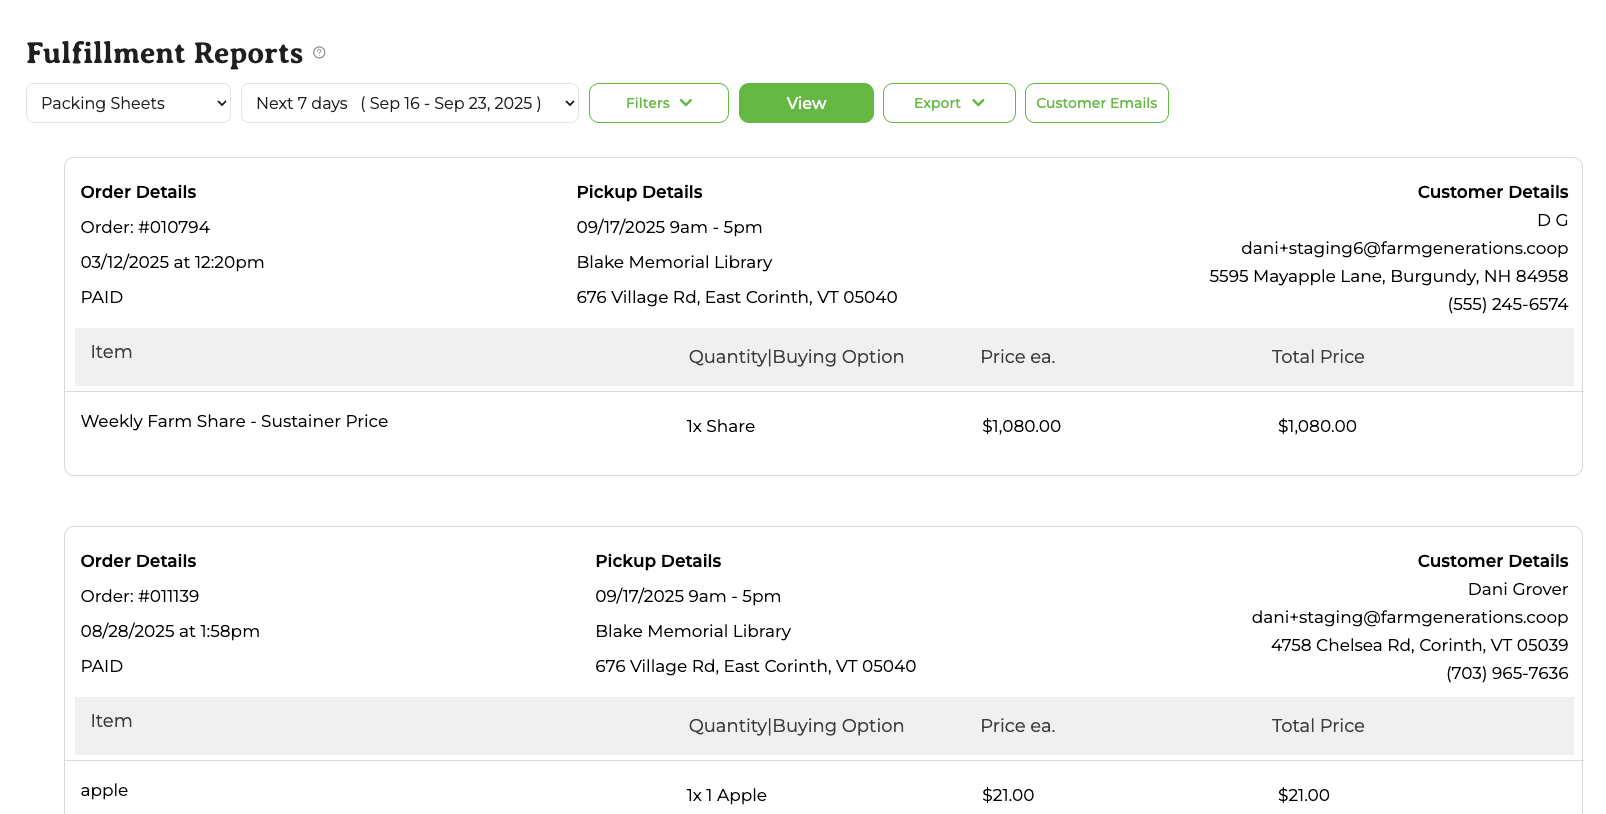
Packing Sheets
Packing sheets are designed for packing orders—especially ones with standard items—and answering the question, "what do I put in this customer's box?" The page on the browser looks like this:
The filters for packing sheets are the same as for the above pages.
The display on the page lists each order in a separate box and gives all of the relevant information to help you make the pick-up/delivery happen: Order #, Pickup details (date, location name, and address), customer details, and product names, quantities, and prices. Each order creates a separate packing sheet, even if it is for the same customer and on the same day.
The packing sheet can be printed directly from a PDF or exported as a .csv. Use the Export Labels dropdown option to create labels. If you have particular label requirements, you can also export and mail merge labels. Contact us at [email protected] for further instruction!